
I had a bike shop replace the freewheel on my wheel.
Gave it back to me with those rings. Said it was important but didn't explain.
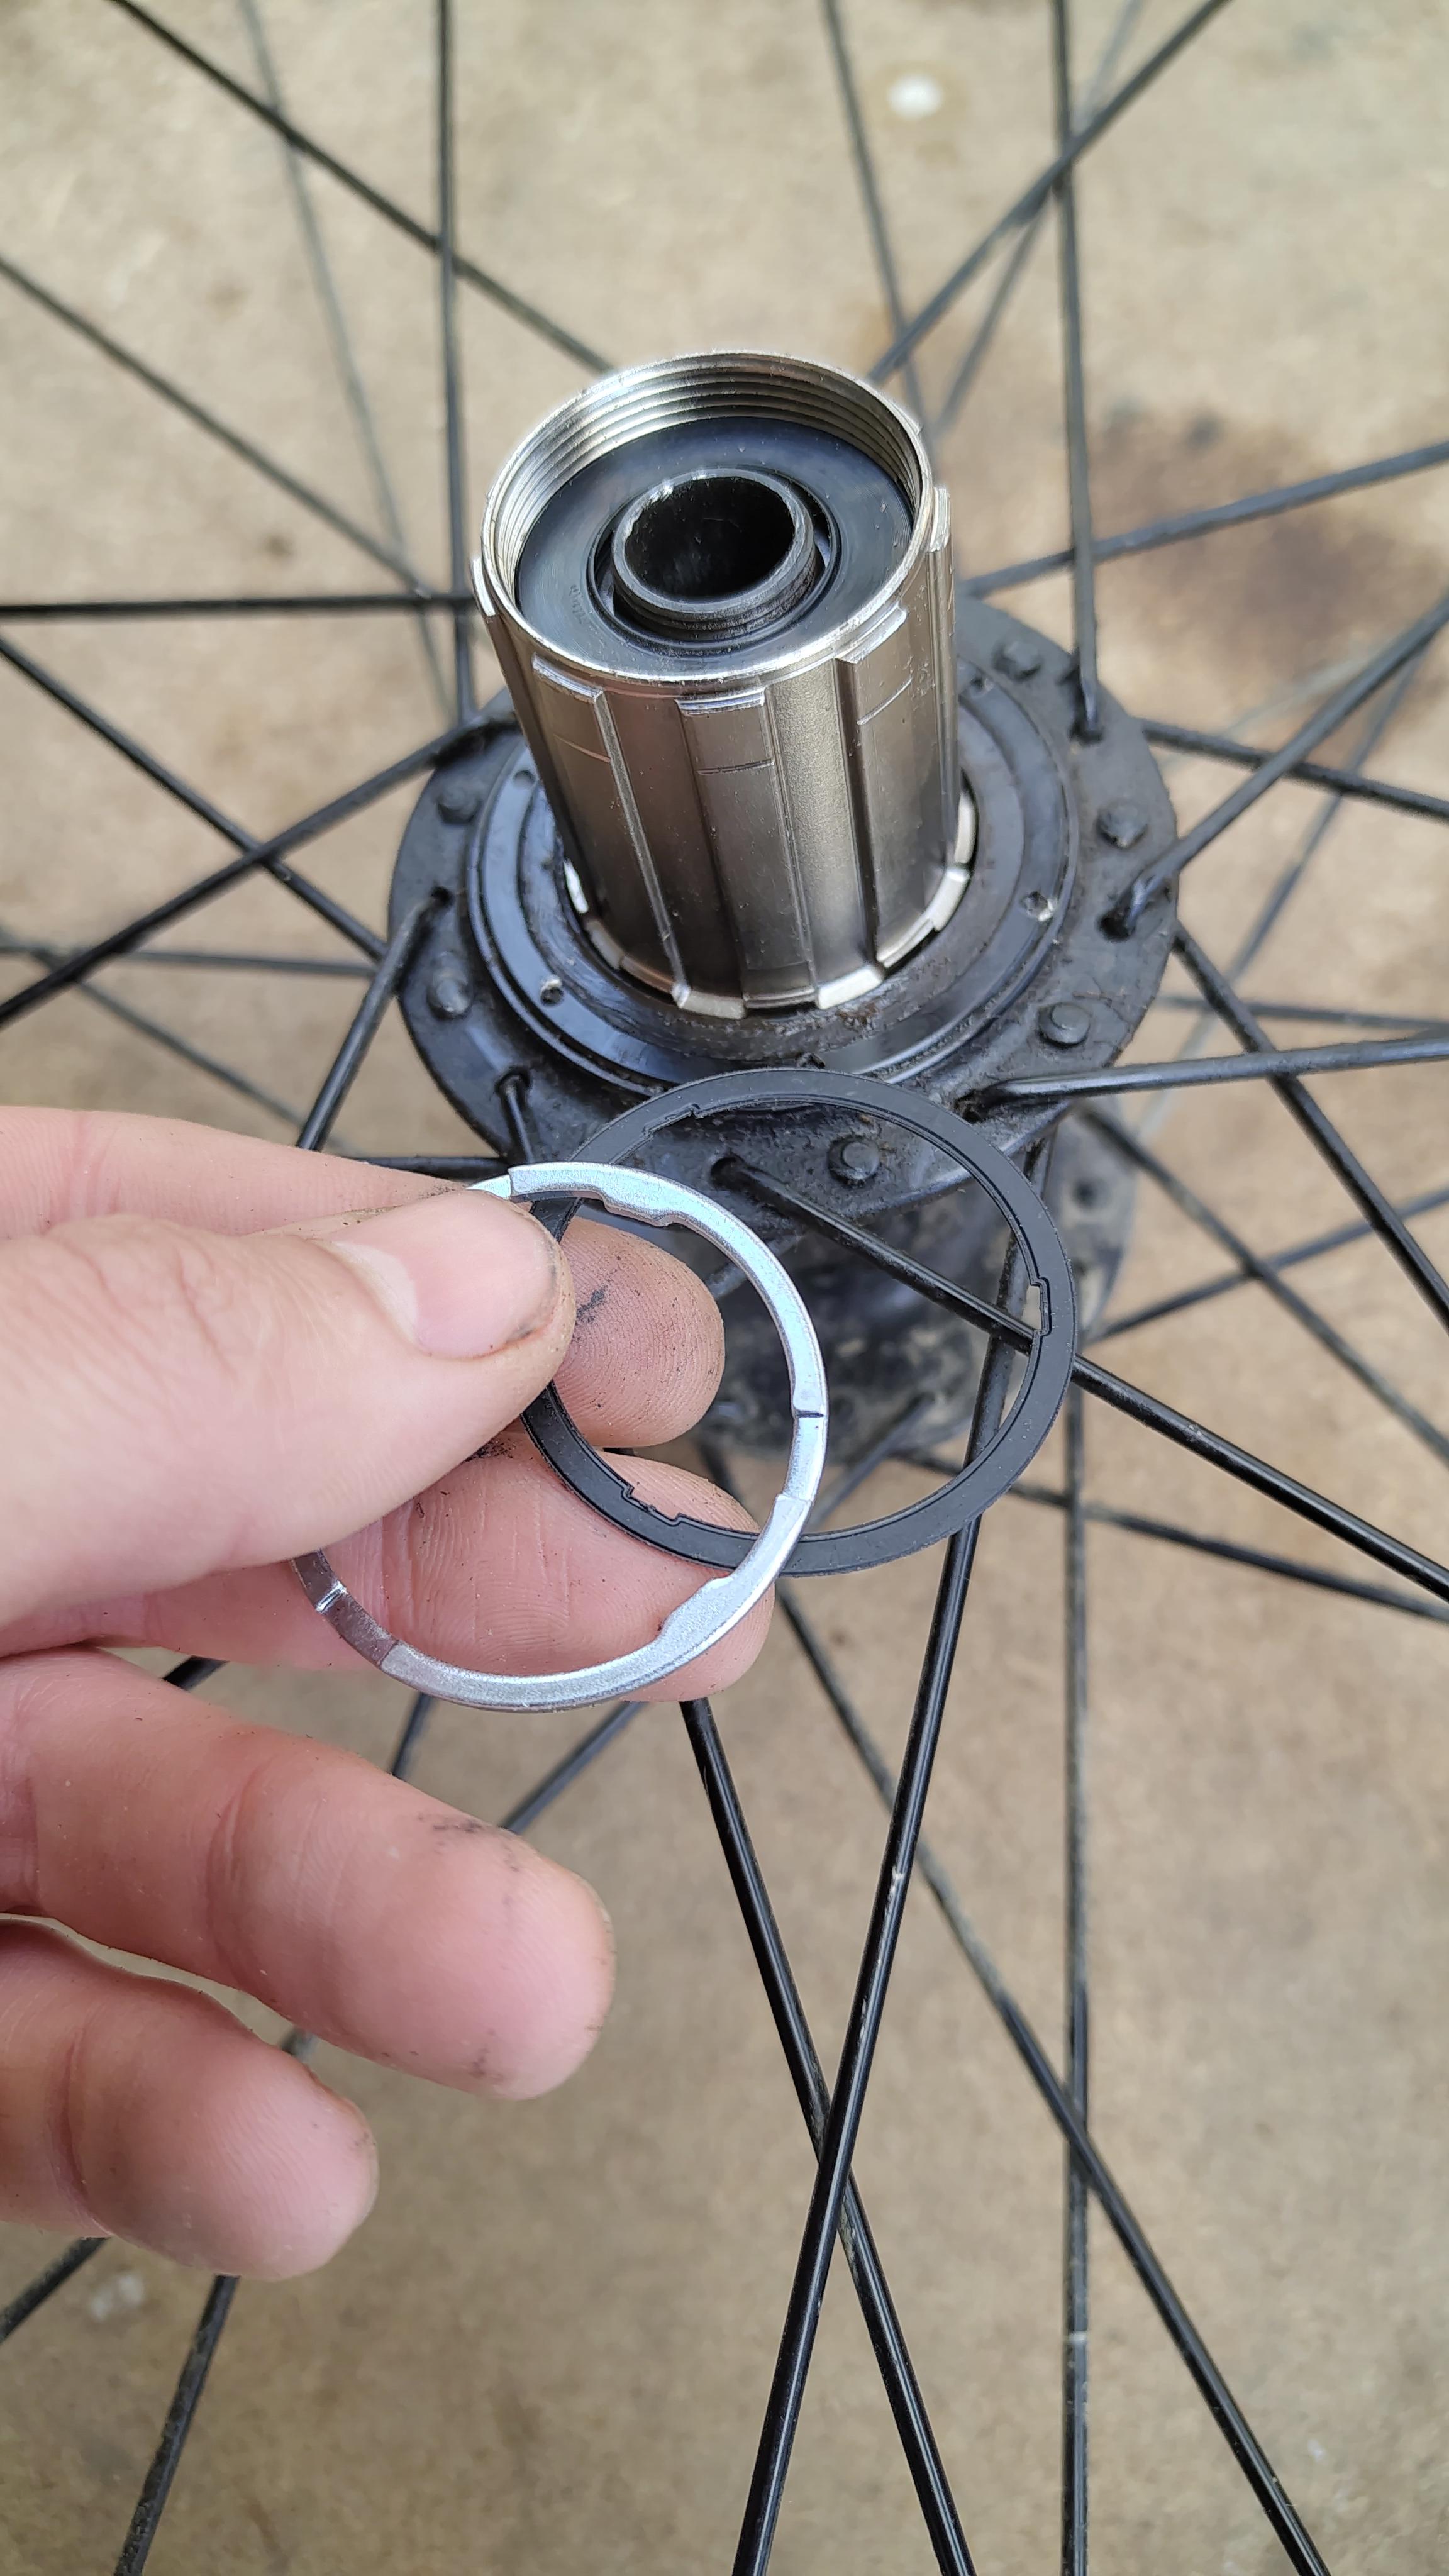
Should I place them before the cassette? In which order?
Thanks
by sonnyp
I had a bike shop replace the freewheel on my wheel.
Gave it back to me with those rings. Said it was important but didn't explain.
Should I place them before the cassette? In which order?
Thanks
by sonnyp
5 Comments
Depends on which cassette you have, you need on that goes first onto the freehub.
https://productinfo.shimano.com/en/compatibility/C-731
you need those spacers when you want to fit a 10 speed cassette. For 11 speed they are not required.
edit: that’s the simple explanation. there are some exceptions for mountain bike cassettes. refer to the manual of your hub and cassette, it should tell you if you need a spacer or not.
They are at the end of the cassette to add some dead space between the hub and cassette. If your hub is 10/11 speed compatible, but your cassette is only 7/8 speed, these rings act as washers to fit the smaller cassette on a high gear compatible hub
[https://youtu.be/n5YkkAP_QVI?si=WFcBFxDp0MD9xVVj](https://youtu.be/n5YkkAP_QVI?si=WFcBFxDp0MD9xVVj)
On my bike (10 speed, on a shimano HG hub like this one):
The silver ring goes first on the hub, then the first part of the cassette, and then the black ring goes before the four last gears.
Check your cassette manual, it should be indicated.
Those are spacer rings that you put on the freehub body before putting on the casette **IF** the freehub body is taller than your casette. The final, smallest cog on the casette should protrude slightly over the end of the freehub body, while still latching on the freehub, so that the lockring can tighten it properly. You don’t want the lockring to compress against the freehub body, leaving the casette untightened and loose.
There are different sizes of these rings, varying thicknesses. One rule, they should be metal. As plastic ones will compress unevenly and leave your casette wobbly. See those indents in the shiny metal ring? Those should match with the rivets/screws on the backside of the casette so that it sits straight and tight on the body.
Be sure to readjust your rear derailleur if your casette’s horizontal position on the wheel is different now.
A good shop would explain. Takes like a minute.