
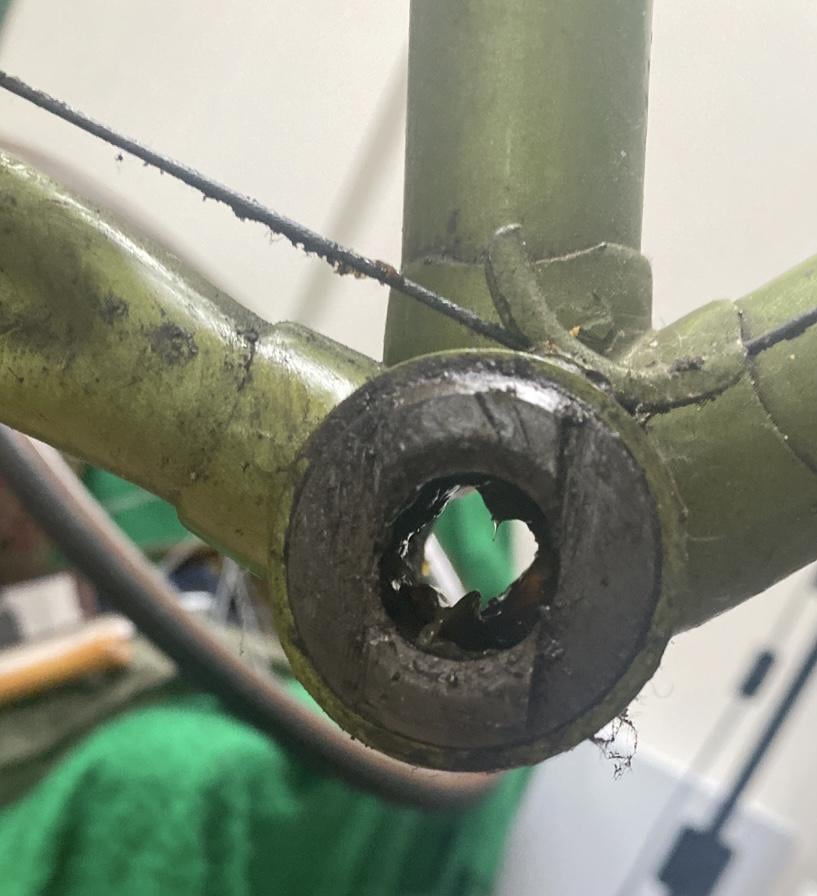
This side of the bottom bracket is so stubborn, struggling to remove from an old Carlton Racer, it's my first restoration project, any advice would be greatly appreciated ! thanks 🙂
by arturitore
This side of the bottom bracket is so stubborn, struggling to remove from an old Carlton Racer, it's my first restoration project, any advice would be greatly appreciated ! thanks 🙂
by arturitore
10 Comments
Not sure if you are aware or not, but that side is reverse threaded.
Edit: whoever commented saying the non-drive side is reverse, down voted me and then deleted their comment is incorrect. Op please just Google it yourself so you get the factual information.
Get one of the clamp on tools, or for shite like this, where you’re unlikely to ever need it again, ask your LBS to remove it for money, you’ll likely want them to chase and face the threads anyway too.
Most bike shops will have the particular tool for this bottom bracket somewhere on the wall. If you want to do it yourself, you will need to use a very large adjustable or crescent wrench) and then devise some way to hold the wrench flat against the frame (a long bolt and large washer is easy enough to find and will do the job).
Hit it with some liquid wrench or other penetrant, and with the tool flat against the face, turn clockwise.
these are really tough. generally only found on old bikes where they’re practically seized, really slim flats make it especially hard to keep a tool on there without it sliding off.
usually what i’d try to do was sandwich the tool onto the bb by sliding the spindle through and then use a crank arm + whatever washers or nuts required to fill out the space, then tighten it down with the crank nut. you can’t make it TOO tight, because the cup needs room to extract once it finally loosens, but you can make it snug at first, just to get it broken free, then loosen it progressively as it comes out.
edit: i also remember someone once carved out a matching channel from a piece of metal stock that would just fit on top of this with wrench flats for putting in a vice. really good but i think we lost it 🙁
Sheldon Brown made a homemade tool out of a large bolt, nut, and four lock washers. It tightens down on the cup as you try to remove it. It’s way cheaper than buying the real tool.
[https://www.sheldonbrown.com/tooltips/bbcups.html](https://www.sheldonbrown.com/tooltips/bbcups.html) and scroll down past Fixed Cup Tools.
And of course the drive side is left threaded.
Park HCW-11 is what you need
https://preview.redd.it/fuzxw5jfihzf1.jpeg?width=3000&format=pjpg&auto=webp&s=b0afac087435906d54546c7950cbb66754232065
You might need this, and impact wrench.
Be careful you don’t damage the cup, as you might need to reuse it. I don’t remember all the details but some Carltons will have unique threading typical of Raleighs. [https://sheldonbrown.com/raleigh26.html](https://sheldonbrown.com/raleigh26.html)
Clamp on tool is must. Soaking in penetrating oil will help. Best are Kroil or 50/50 acetone and auto trans fluid. Cleaning everything and carefully heating with a torch can break really stuck ones free. Even with a wet rag on the frame, it can be hard not to cook any of the paint though. The idea is just heat enough to get significant movement from expansion, then let everything cool.
Anyone else wonder where that front derailleur cable is going?