
Hi there,
Two months ago i bougth my first bike. I am totaly hooked, but have no idea of the basics.
Today i had my first puncture, almost two hours to repair it, so i am all in for tubeless.
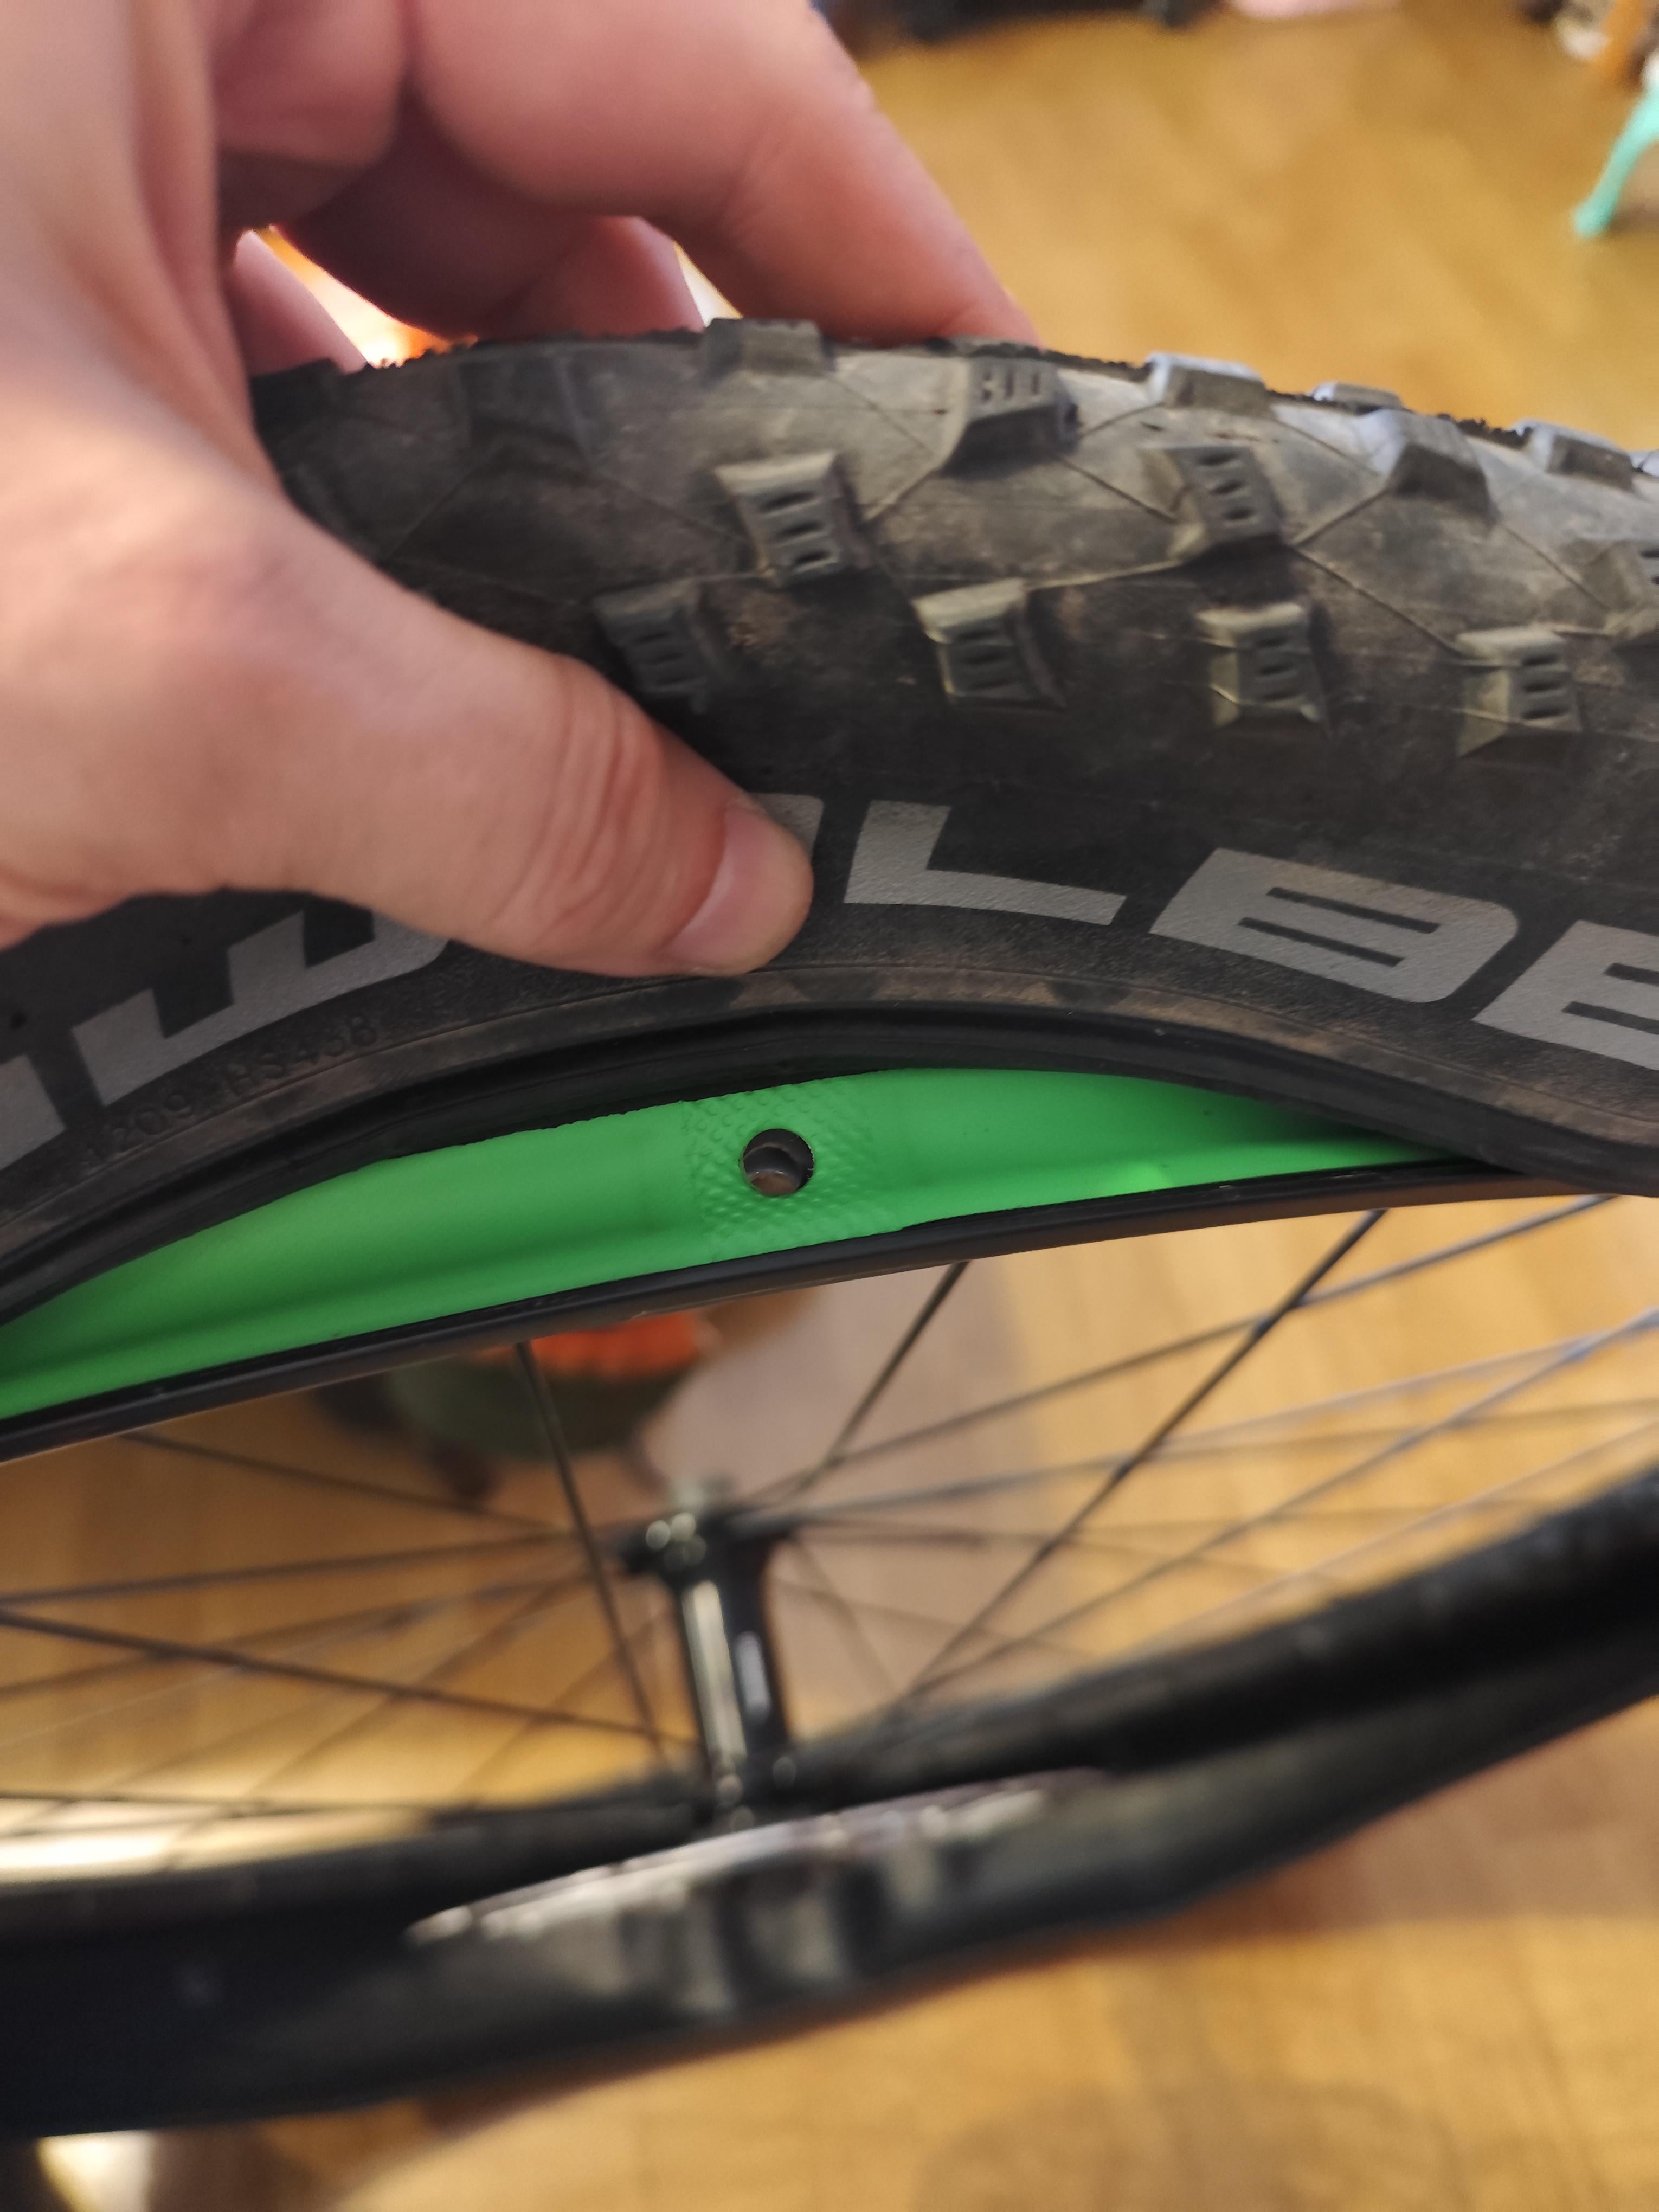
This is a pic of the rim and wheel, somewhere it says "tubeless easy". As i can't see the holes for the spokes, and it looks like the bandage for tubeless, is it ok to change the valve, put the sealant liquid and "forget" about punctures?
English is not my mother language and i am on mobile, so please forgive my mistakes 🙂
by nando585858
14 Comments
Best thing to do is to get actual tubeless tape and re-tape the wheel. That looks like rim tape and not “tubeless” tape.
If you need 2 hours to change tube, I would not start the tubeless mess.
You need to tape the rim, to seat the tire with booster pump or compressor. It requires some experience and some investment.
Your English is great!
You need proper tubeless rim strips or tape, tubeless valves, and sealant. But I agree with another poster, if it took 2 hours to change a flat setting up tubeless tires for the first time might not be the best option.
I’m with u/Stiller_Winter: familiarize yourself with basic bike maintenance, foremost swapping out tubes, your bike in specific, and bikes in general, before considering modifying the current configuration. Going tubeless can be much more complicated/aggravating than occasionally replacing and repairing a tube (which should take you less than 10 minutes road/trail side).
FYI: what your photo is showing is the rim bed of a double wall rim with its rim strip and presta valve stem hole.
If it took you 2 hours, next time it will be 1 hour 🙂 You will get faster and more continent in maintenance quite fast.
I did this when I got into MTB. You will need to use gorilla tape or name brand tape on the rim and a valve core. In addition, you need a special pump that will push enough air initially to the wheel so it beads and seals the tire.
I used this exact video 6 years ago. It shows you how to use cheap tape and reuse your old tube.
https://youtu.be/zI9DM34LHAo?si=I0qgWGaZd2GZqujP
I’ve since gone back to tubes because I’m doing more street riding.
You should make sure that the rim is tubeless ready.
Fixing a tube puncture will take no more than 10 minutes once you get some practice. Having the bike shop set it up tubeless will leave you with no recourse when you do get a puncture, which you will. Tubeless doesn’t mean no punctures, it just means fewer punctures. When a tubeless wheel inevitably punctures, fixing it is a real mess. I wouldn’t recommend going tubeless until you’re ready to do the maintenance yourself. You don’t want to leave your bike at the shop for days for something as simple as a puncture.
Instead of going tubeless which this is not at all set up for get a good set of tire levers and a spare tube to ride with.
Tubeless doesn’t let you forget about punctures, sealant will fill up to certain sized holes after that you have to worry about emergency boots / plugs all which are significantly more work than replacing a tube
People go tubeless for kinda same reason but different.
Tubeless allows lower pressure. As a result more grip. Relevant when going down a lot with a speed.
As a side benefit – yes – puncture protection. Especially when riding trails that have spikes or sharp rocks.
The biggest deciding question is – are you ok with lower pressure? And what terrain you’re mostly riding?
There are lots of variables and as you’re a new cyclist, unless you’re really into working on your bike and the learning curve, I would avoid trying to set this up yourself. I’ve been cycling decades, worked on my bike loads, but I paid by local bike shop $150 to set it up for me.
The good news is, learning how to change an old school tube is easier than learning how to set up a tubeless tire. And if you use heavy gauge tubes, or sealant filled tubes, a puncture is less likely.
For me the biggest benefit of tubeless so far is I can fix a puncture fast(with a plug, the way you’d do a temporary fix on a car tire), without taking the wheel off the bike. Had two punctures since March so far, on a gravel bike.
Good luck whatever option you go with.
Tubeless requires maintenance every couple of months so keep that in mind. You gotta refresh the sealant every so often and same with rim tape.
Having said that all my bikes run tubeless. I honestly and strongly recommend you learn to do it yourself. You might struggle the first few times but eventually you’ll do it in a jiffy. I can retape and redo a wheel in 10m now.
You’ll need: tyre levers, tubeless air valves (muc off and peaty are good brands), air compressor (very important) or a pump (chamber pump also good), rim tape that matches the inner width of your rim and sealant. Nice to have: stan’s no tube sealant injector. You can inject sealant through the valve without making a mess.
Plenty of youtube tutorials on the process.
You can out sealant directly in the tube and basically forget about punctures. The caveat is it doesn’t protect against snake bites. So if you’re running low psi and really aggressive riding you may still get them. But as far as thorns or other sharp objects, sealant in the tubes works just as well.
lol I got news for you, if it took you two hours to fix a flat it’s gonna take you like 4 hours to set up tubeless if you even manage to without taking it to the shop after failing to set the bead with your floor pump and getting sealant everywhere. There’s more maintenance that’s more messy too. You can still get a flat as well.
Trust me on this. Learn how to fix a flat properly. It shouldn’t take you more than 10 mins trailside. When you know more and are actually ready then go tubeless.