
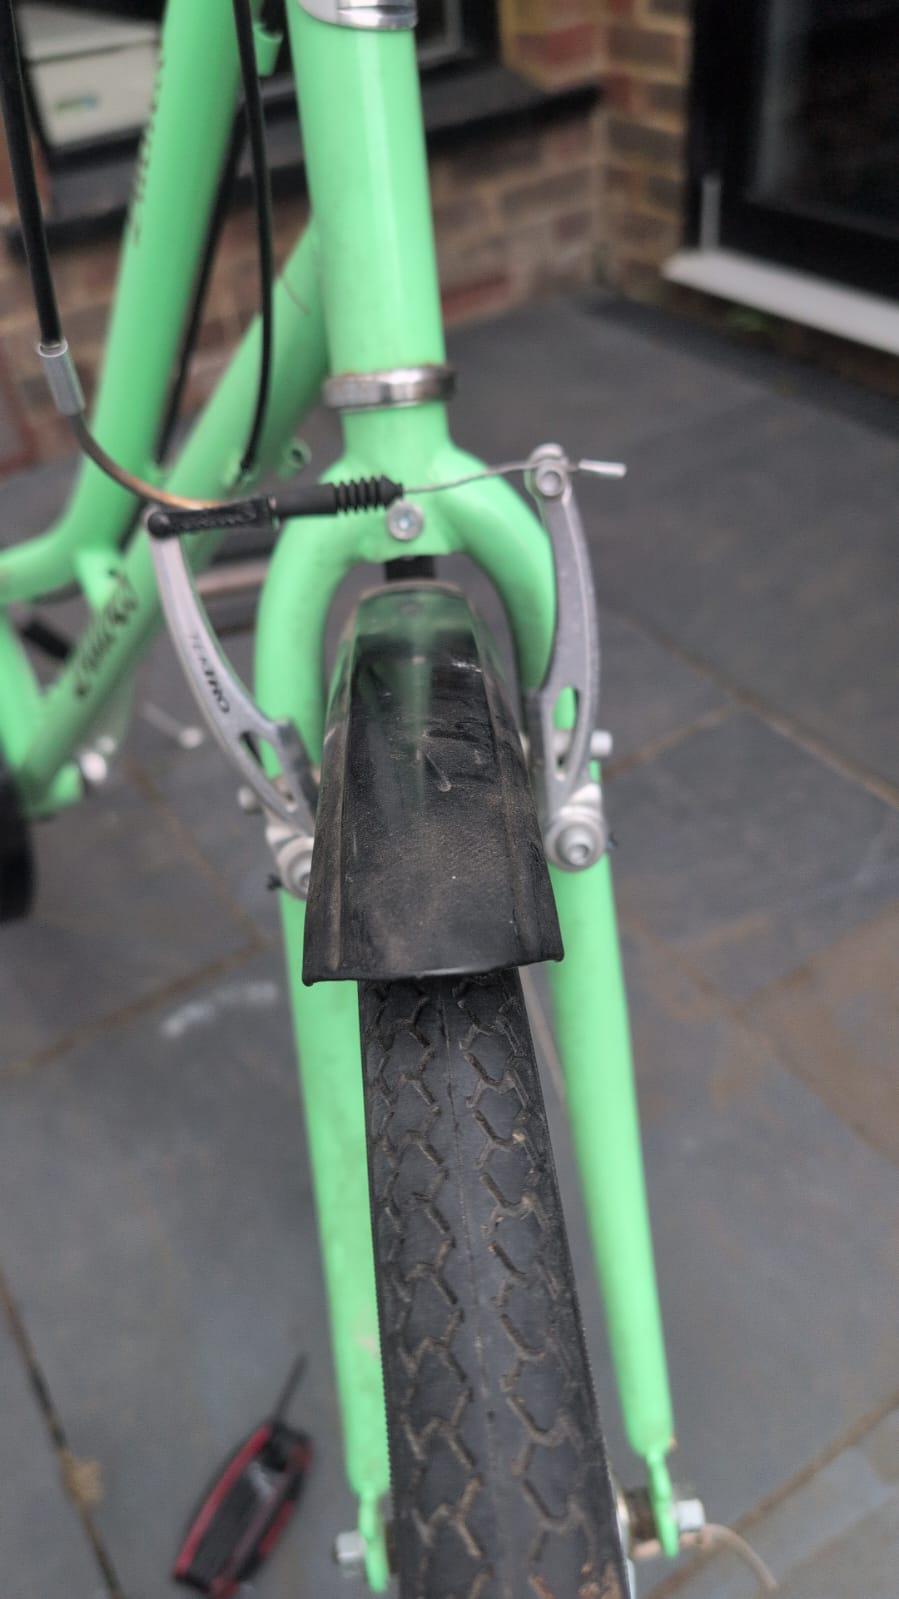
This has driven me crazy, I've watched every YouTube video going so I think I understand how to line this up.
Everytime I connect the wire, it feels like the side with the noodle on is really tight against the rim, almost like it's pointless using the screws to adjust. To get it off the rim, I move the wire until it's so loose the brake is pointless.
Can anyone relate to my problem, or offer some words of encouragement? I've got a few more hours to kill on this tomorrow again before I have to pay someone profesionally, but I"d love to know how to do this myself!
by wallyflops
9 Comments
Your brake wire on the clamped side is very lax.
V-brakes are a really simple mechanism when you look at it – each side has a spring to push the arm back out and there’s a little screw which can adjust the tension of that spring.
It’s just a case of tightening the side that doesn’t come out or loosening the side that does until they are even.
If the screw is all the way in and it’s not having an effect then unhook the spring from behind the brake arm and bend it a little then do it again.
The cable should be tight enough that each side is a few mm away from the rim – then use the above to get them even. The cable doesn’t make any difference to which side is closer – just the amount both arms move between them.
The first thing I’d do in this case is check that the screw on the right hand side (as you look in that photo) is doing anything – if it isn’t then do the bending the spring thing like I described.
Edit: the other thing that matters is the spacers used – if you look at the pads there is a thick and thin spacer and you want to use the appropriate one between the fork and the pad so that they’re a good distance from the rim – which one depends on rim width and fork shape.
Could be the spring that holds the brake arm. I saw a bike mechanic pull it out and bend it forward then put it back in the brake assembly. I’ve tried it and it seems to work, but it may or may not be the way to fix it.
It looks like the cable is slack. Is the return spring for the non-drive side arm installed correctly?
When the noodle is out, does the arm spring away from the rim?
Step one.. pull the calipers off, clean everything, grease the posts and reinstall in the center hole (if three).
Step two, readjust the screws and try again… make sure the wheel is straight in the dropouts and true first.
Step three.. if that didn’t fix it, check the actual condition of the springs. You can bend them back a bit to create tension.. I usually leave it attached to the caliper and bend the entire arm back with the spring to keep it all squared and centered.
Step four.. if that didn’t work, you can experiment with different anchor holes (if three) and see if that solves it.
Step five.. if all else fails, get different brake calipers.
The one you have to tighten. Also, there is a screw on that side if you turn it inward will increase the tension, which should move the brake pad off the rim. Do that after you increase tension on the wire.
Cable tension and individual cantilever tension . You can take up some of the slack until there only about 2mm gap on each side. Then adjust the tension screws. If you ease up the screw on the left and tighten on the right, the brakes will shift right. Try working with quarter turn adjustments. Sometimes a little trial and error happens.
Also be sure to check your wheel true. Sometimes folks adjust the brakes only to realize the wheel wasn’t straight to begin with.
Have you taken them off the forks? If you have the springs in the back usually have 3 holes that they can go in, make sure they are both in the same hole. ie both in the top, or middle etc. If just re tensioning, back both adjusters off, then adjust the offending side so that it isn’t rubbing on the rim. Be carefull if the adjuster housing is plastic, they are very easily broken.
Go watch the park tool video.