First I had to find studs in the wall. There is no way this will work only on drywall or in my case, plaster. I used my stud finder and measured the gap between two studs and it was perfect for the smaller of the two bike frames’ main triangle, which meant naturally that my larger bike would fit as well.
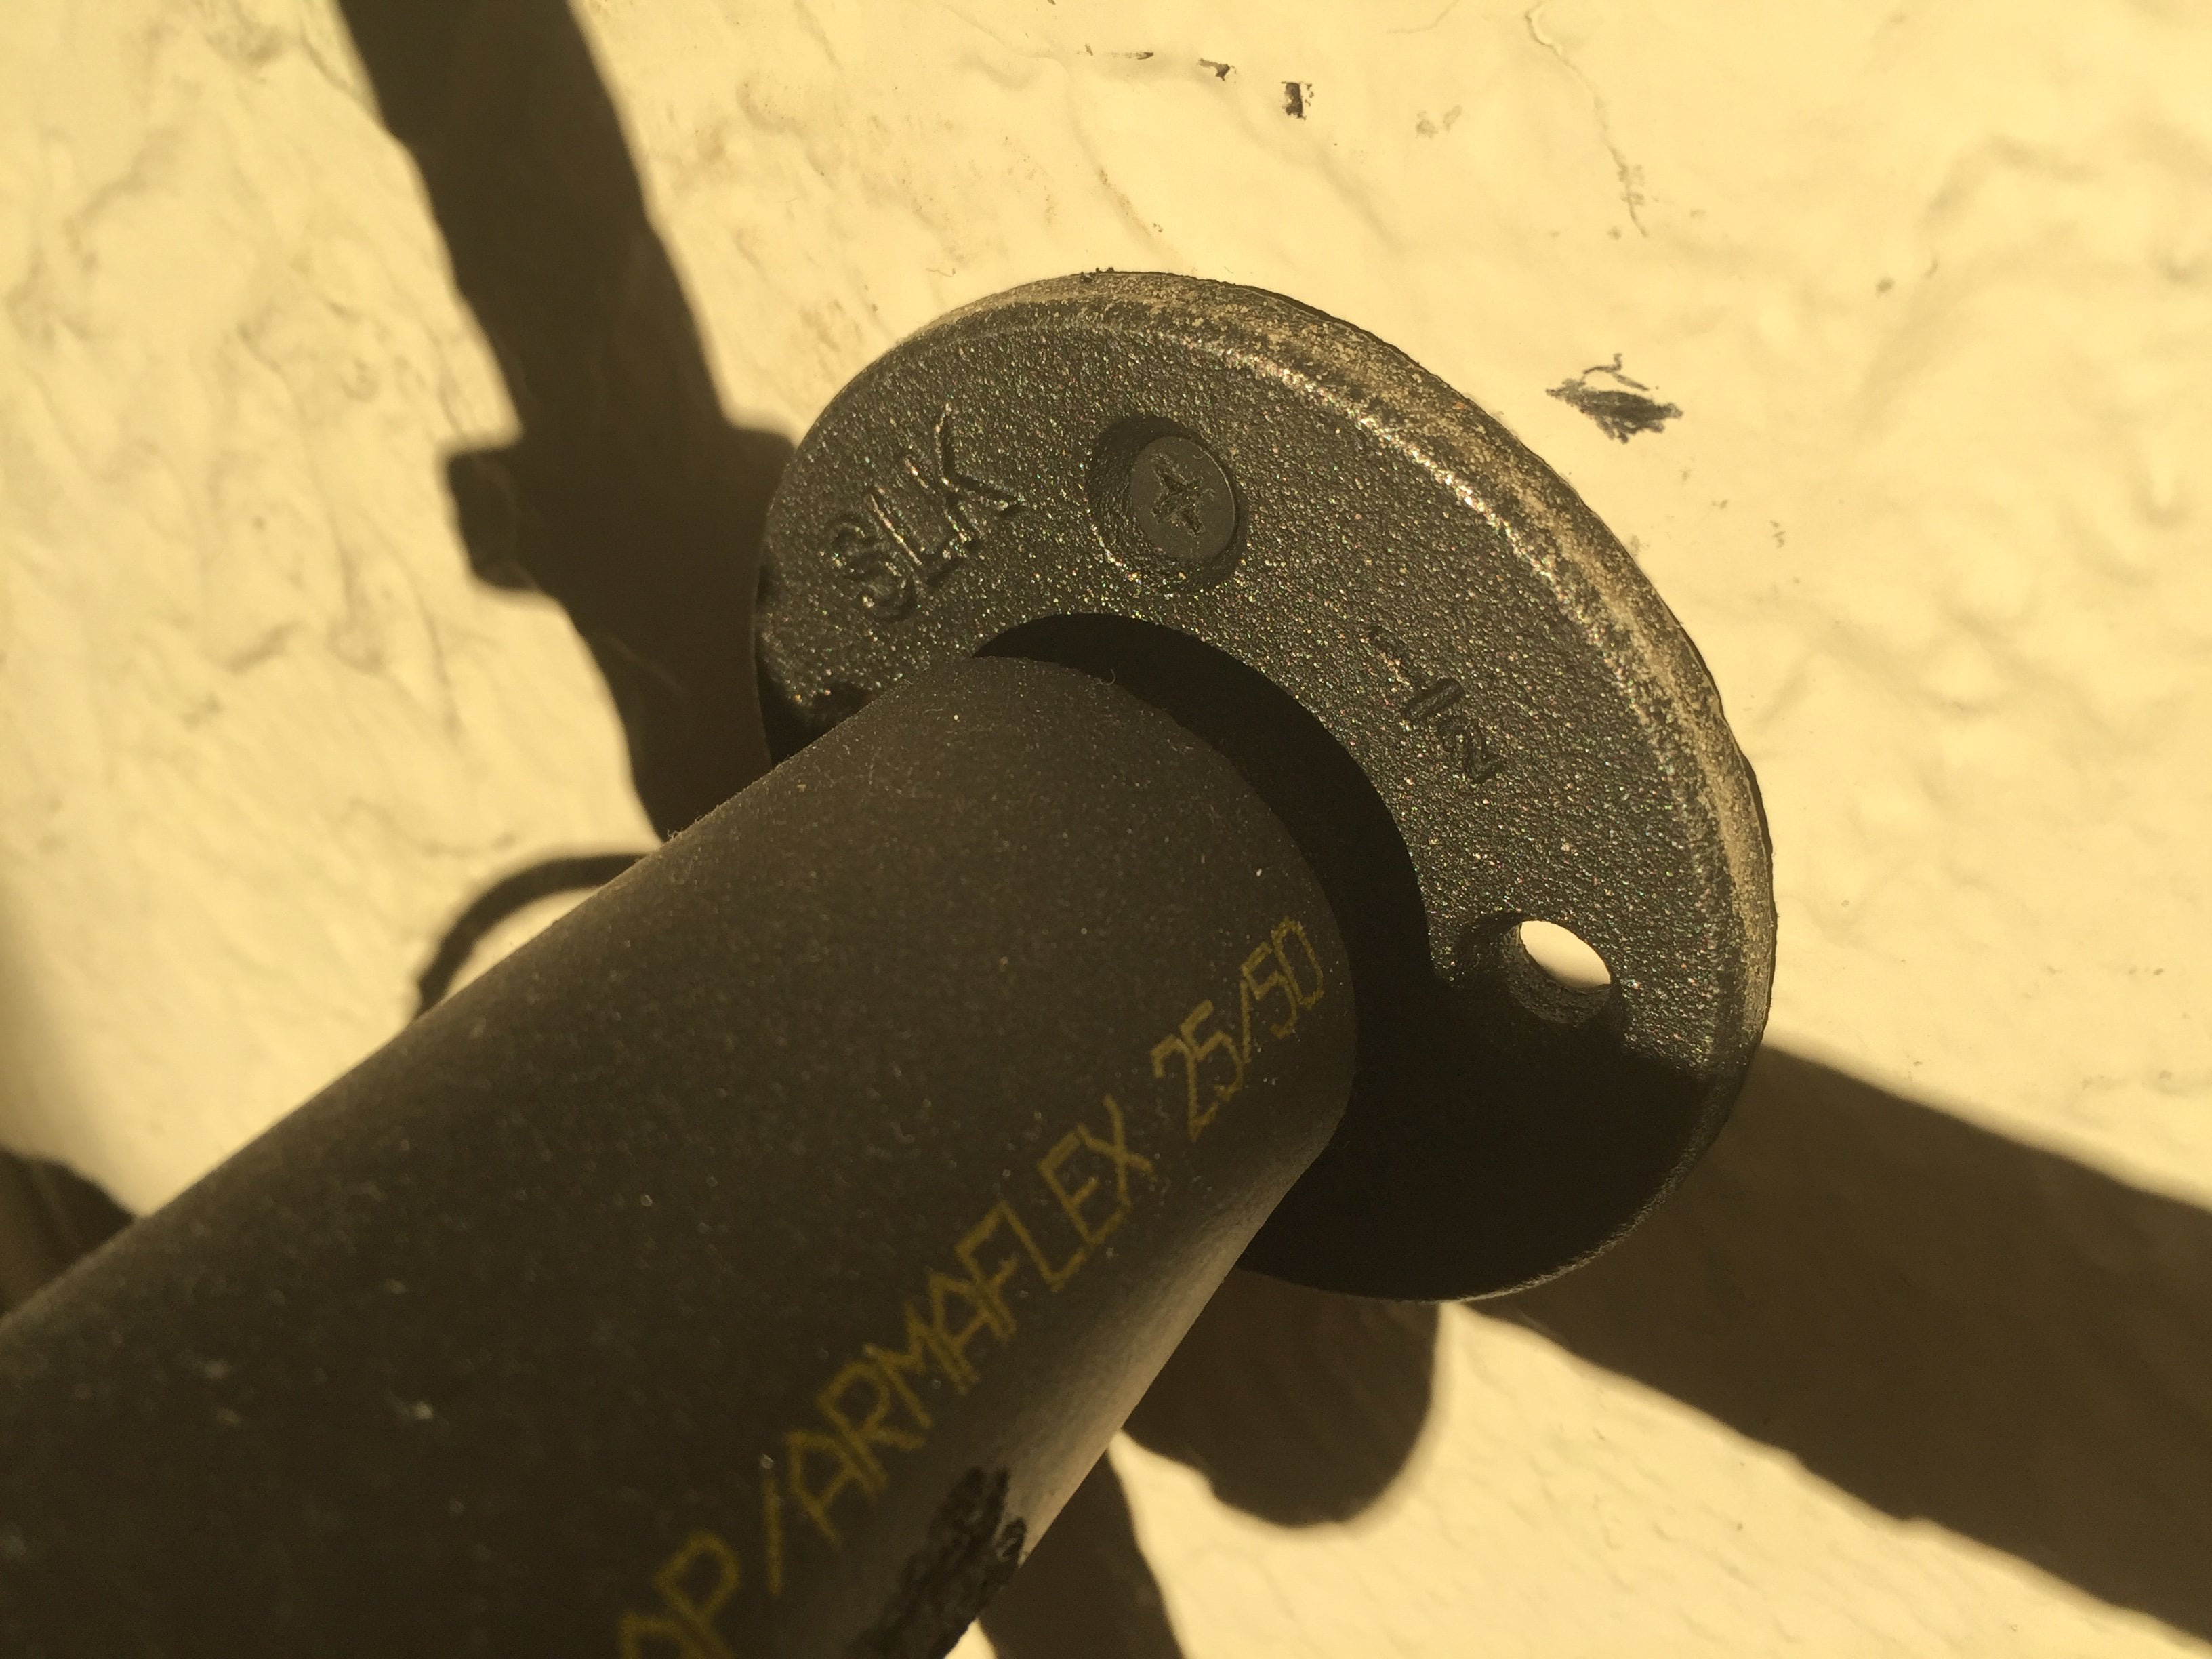
Second, I purchased pipes as legs and measured them by leaning my bike against the wall with the handlebar barely touching and measuring out to an inch or so past my top tube, had them cut and threaded at Home Depot on both sides. I also got 90º pipe elbows that matched the pipe diameter just to secure the end and make it look cooler, piping insulation to cushion the bikes’ frames, and finally, pipe flanges that also matched the diameter of the pipes. The pipe flanges are what interface to the wall.
I really only needed eight screws total, two in each pipe flange (top and bottom, facing the flange, no need for left or right), and two flanges per bike. I recommend long, thick screws that really bite into the stud. I pre-drilled, and used my drill driver and all my weight to really drive the screw in well.
The toughest part was actually figuring out how much higher one flange would need to be for my wife’s mount… this is because her top tube is a sloping top tube, whereas mine is just straight/traditional. I eyeballed it and guessed a little more than an inch… it worked out!
Our handlebars would also sway and turn away from the wall if it had not been for the little lip already there. This is due to a very slight droop once the bike is on the pipe, which makes the bike lean a degree or two. But this is easily remedied if your brake/shifter is rubber and you set the handlebar right up against the wall. It may leave a mark on the wall, so beware.

1 Comment
I took the idea from an [Instructable on pipe leg tables](http://www.instructables.com/id/Pipe-Leg-DIY-Table-Build-From-Any-Wood-Table-Top/) and modified it to hang the bikes.
First I had to find studs in the wall. There is no way this will work only on drywall or in my case, plaster. I used my stud finder and measured the gap between two studs and it was perfect for the smaller of the two bike frames’ main triangle, which meant naturally that my larger bike would fit as well.
Second, I purchased pipes as legs and measured them by leaning my bike against the wall with the handlebar barely touching and measuring out to an inch or so past my top tube, had them cut and threaded at Home Depot on both sides. I also got 90º pipe elbows that matched the pipe diameter just to secure the end and make it look cooler, piping insulation to cushion the bikes’ frames, and finally, pipe flanges that also matched the diameter of the pipes. The pipe flanges are what interface to the wall.
I really only needed eight screws total, two in each pipe flange (top and bottom, facing the flange, no need for left or right), and two flanges per bike. I recommend long, thick screws that really bite into the stud. I pre-drilled, and used my drill driver and all my weight to really drive the screw in well.
The toughest part was actually figuring out how much higher one flange would need to be for my wife’s mount… this is because her top tube is a sloping top tube, whereas mine is just straight/traditional. I eyeballed it and guessed a little more than an inch… it worked out!
Our handlebars would also sway and turn away from the wall if it had not been for the little lip already there. This is due to a very slight droop once the bike is on the pipe, which makes the bike lean a degree or two. But this is easily remedied if your brake/shifter is rubber and you set the handlebar right up against the wall. It may leave a mark on the wall, so beware.
Hope this was helpful!