
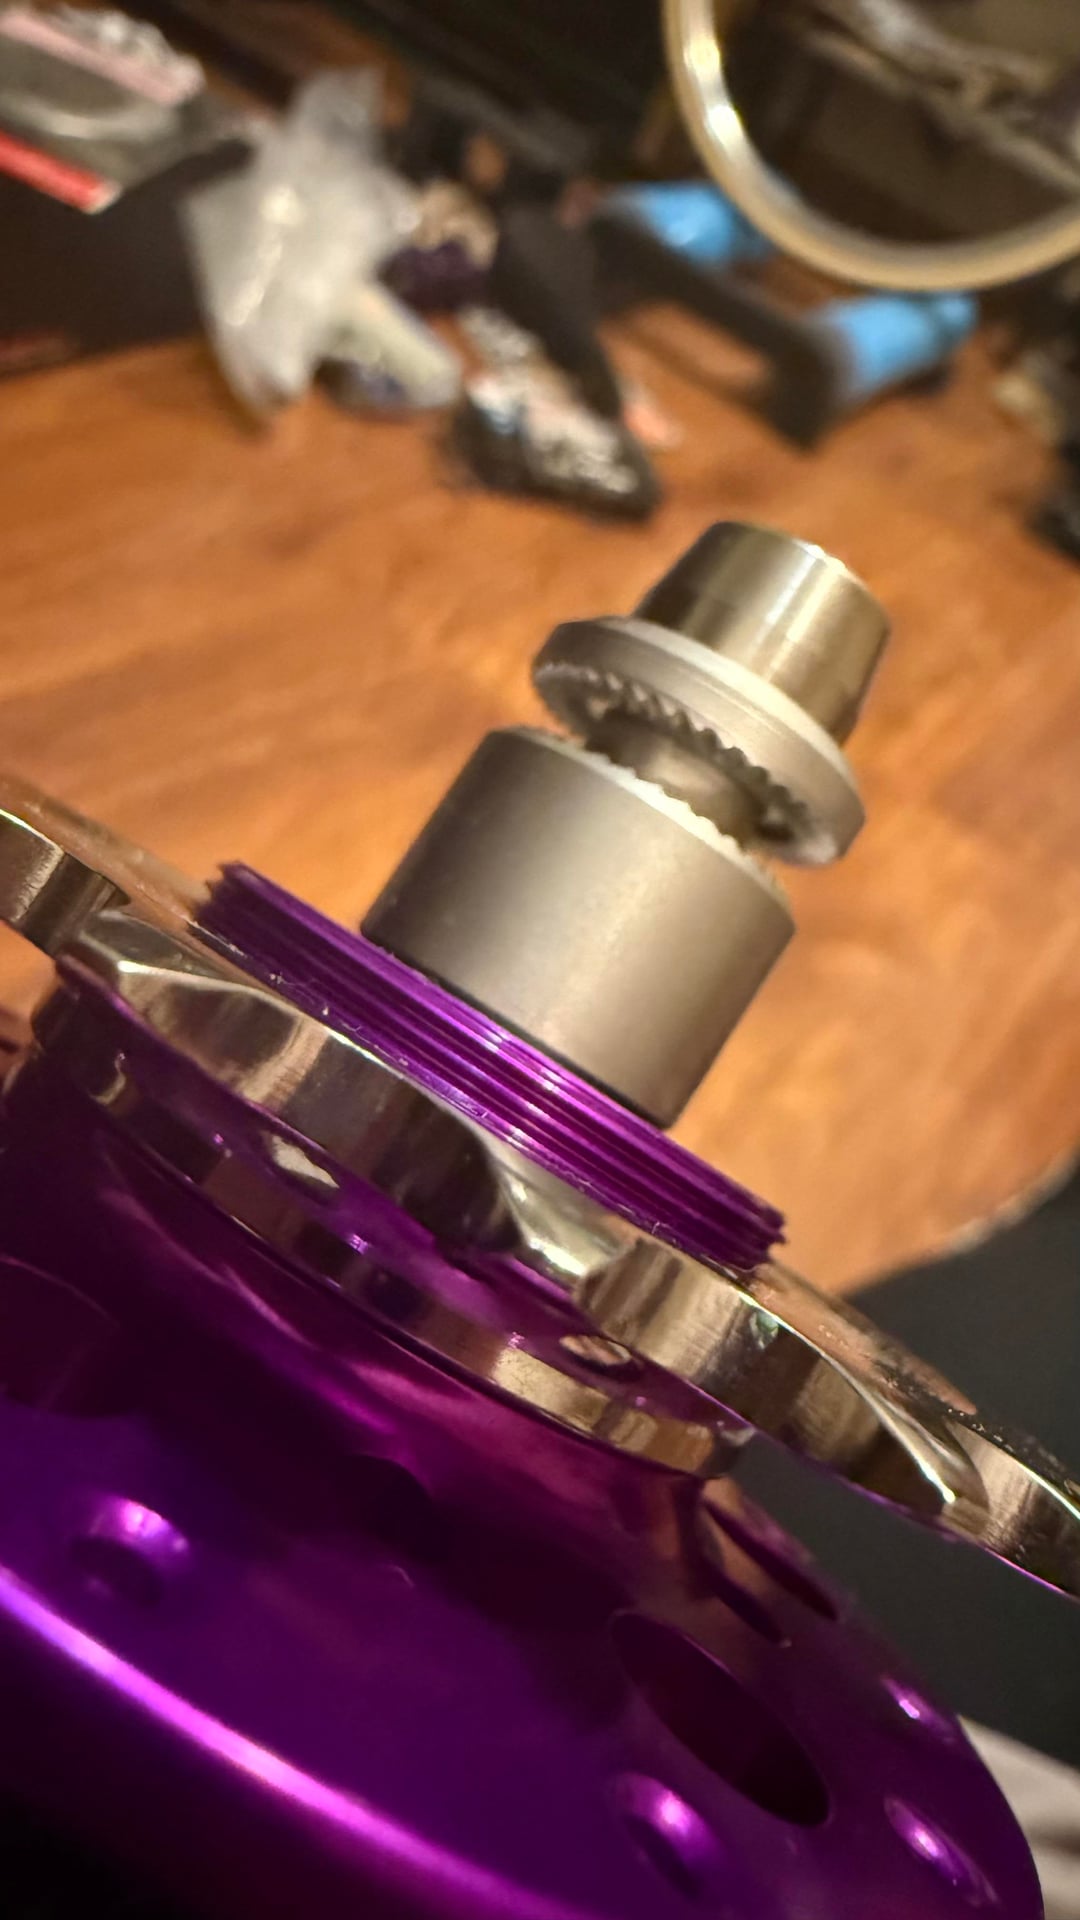
Idk if there are any fixed gear cyclists, but anyway.
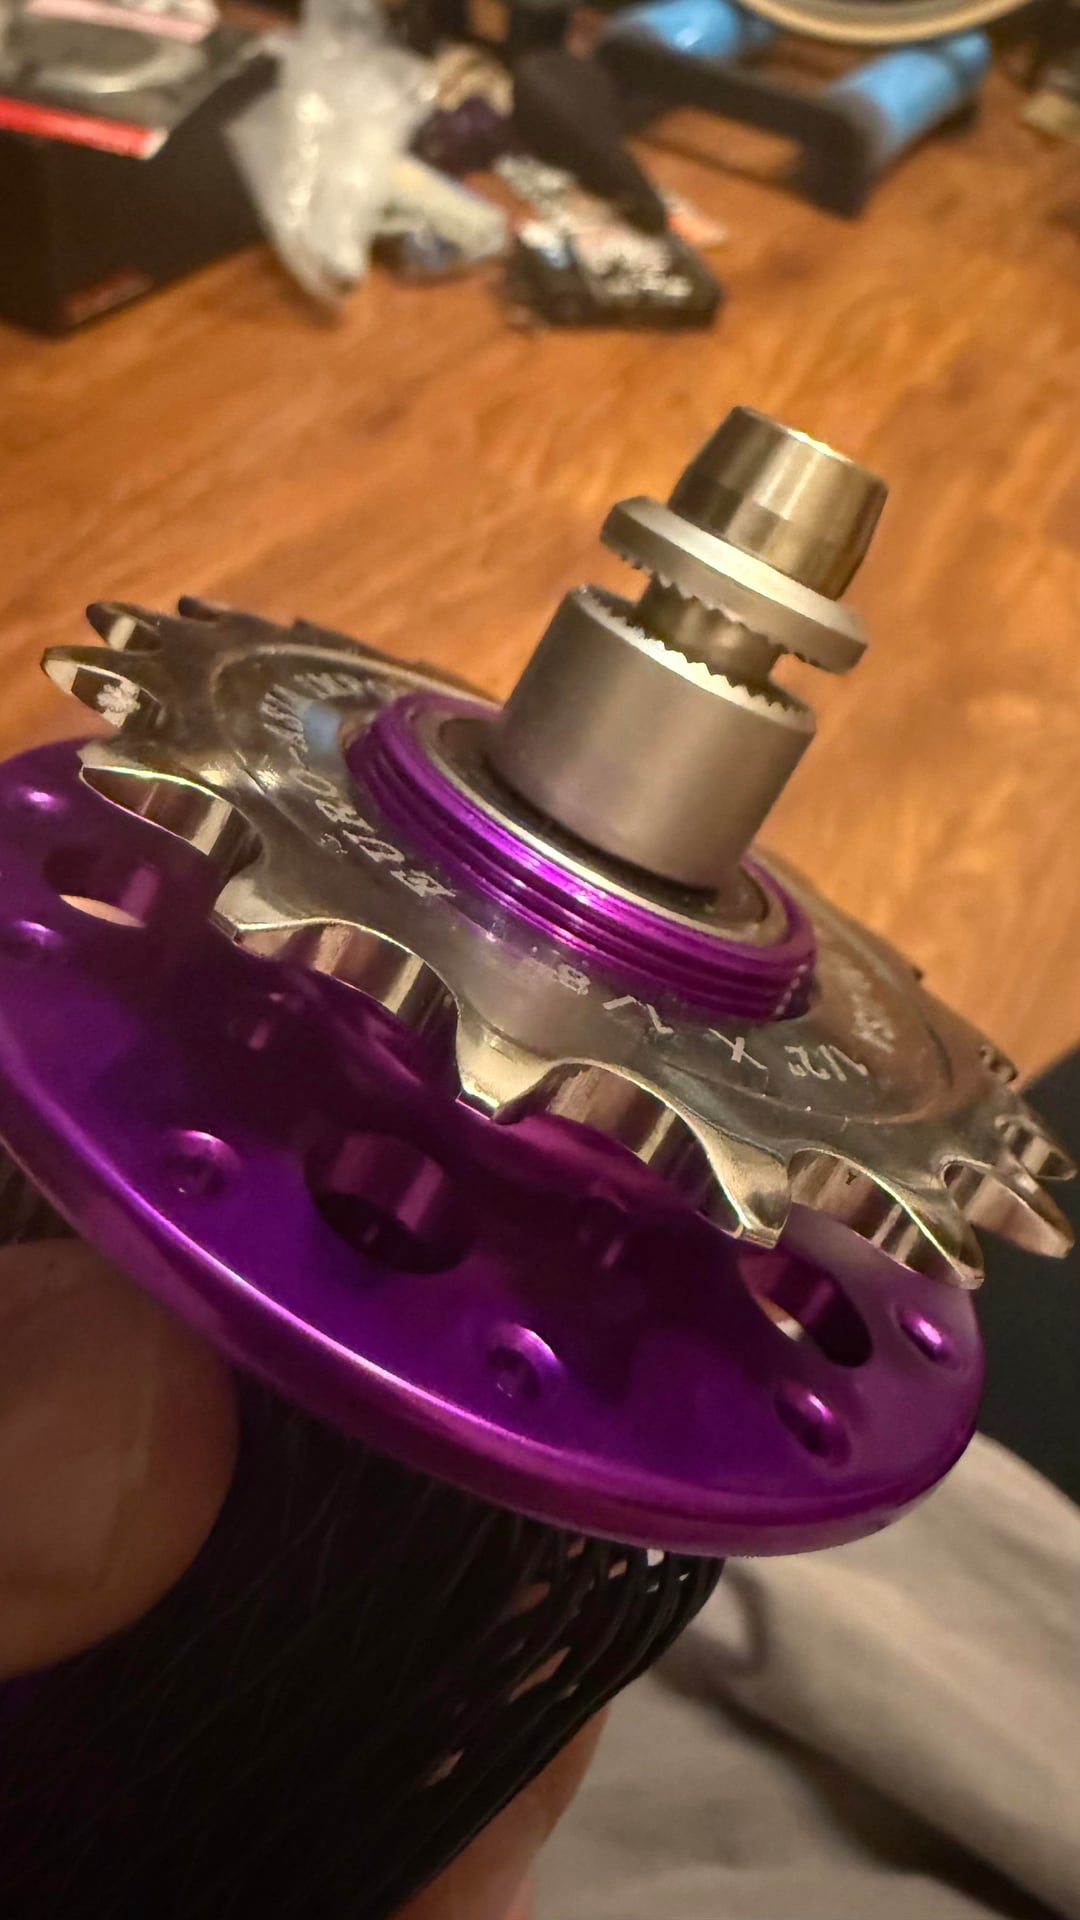
I have a Phil Wood hub and EAI cog.
Question is – is this enough thread for a locking ring?
I heard that there a specific cogs for Phil hubs that are .4 mm thinner than others but i won’t have access to any decent bike shops in near future.
Is it stupid to try and sand down ~1mm of cog (it’s hardened steel)
by Otherwise-Feed4636
4 Comments
Don’t sand/grind, you won’t get it flat. If the lockring sits flush with the end of the threads, you should be fine. If not, try a 3/32 cog, depending on the manufacturer they may be thinner.
There are two threads on there right? One RH on a shoulder for the cog and one LH with a smaller diameter for the lockring. If there aren’t two threads, it’s for a single speed freewheel and shouldn’t be used fixed.
> is this enough thread for a locking ring?
Yes. Total length of thread is what matters, not the number of ridges. Two full turns and change on a 1 3/8″ diameter fastener is more than enough for the required torque (~40 Nm IIRC).
> Is it stupid to try and sand down ~1mm of cog (it’s hardened steel)
Assuming thats an 1/8″ cog, removing one milimeter from it would make it thinner than a 3/32″ one, basically a 9 or 10 speed sprocket.
Yes, it’s stupid.
> I heard that there a specific cogs for Phil hubs that are .4 mm thinner than others but
Is this where you heard that?
https://www.reddit.com/r/bikewrench/comments/3yyyod/phil_wood_track_cogs_are_thinner/
> Is it stupid to try and sand down ~1mm of cog (it’s hardened steel)
You won’t succeed.
> Question is – is this enough thread for a locking ring?
No. Use a Phil cog.
Do not sand the cog down. You need that surface perfectly parallel and full face to get a proper mating seat with the hub. Do not sand it.
The lockring is not a traditional threaded purpose, it’s a jam nut, not intended to take any axial load. You don’t need hardly any thread engagement, and what you have is fine.
If you like your cog and want a different solution, here’s two tips:
1) make sure your cog is full-caps, all the way, biggest font possible *TIGHT*. Usually when you ride, especially track, the first ride tightens down that cog tighter than any wrench ever could. That’ll give you a little extra thread there, so that helps.
2) Surly (used to?) make a lock ring that has an extra lip on the threaded part that kinda reaches under the cog’s threads for extra engagement. See if you can track down one of those.
That’s a nice bit of kit you’ve got there. Phil Wood is exceptionally awesome. Always good to see their stuff in the wild. Cheers