Dude you’ve got an unused canti post right there, just look up Brake Therapy and mimic what they did.
edit: that came out a bit harsh, but clearly you know how to fab stuff I just think the shown solution is clunky and unnecessarily complex while also having drawbacks.
EndangeredPedals on
Simpler to get a frame that takes a disc brake.
dungeness_n_dragons on
A v brake has never made me this mad
baconbananapancake on
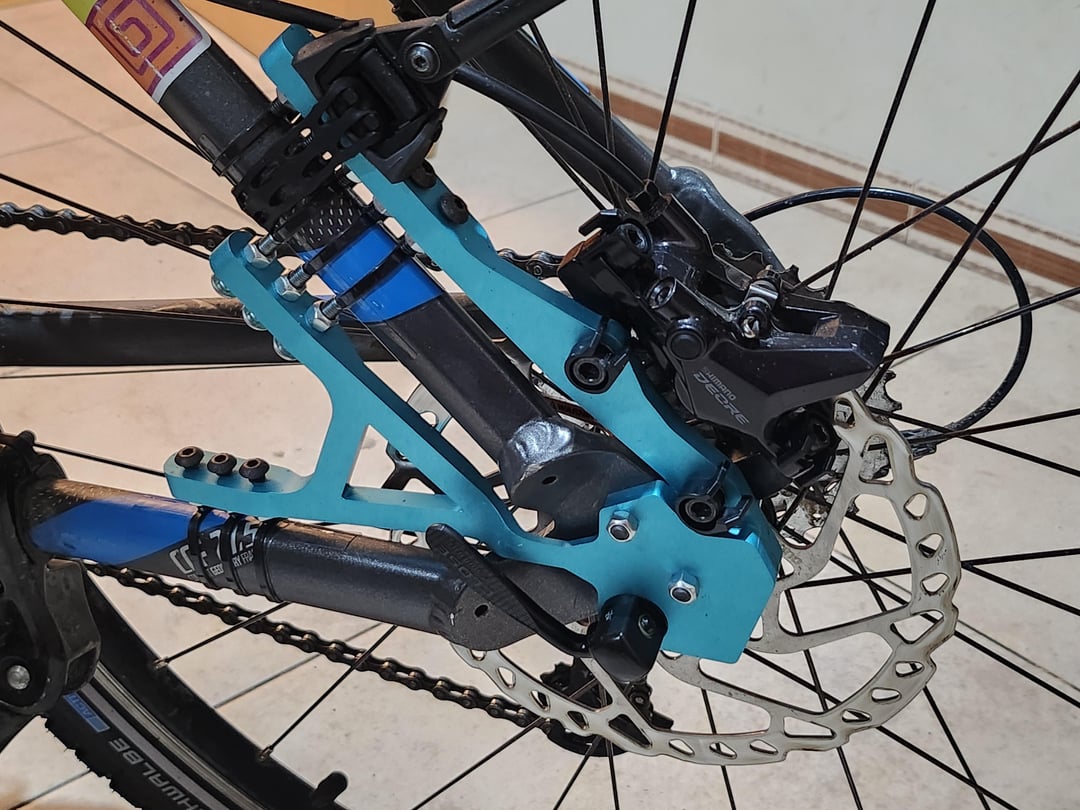
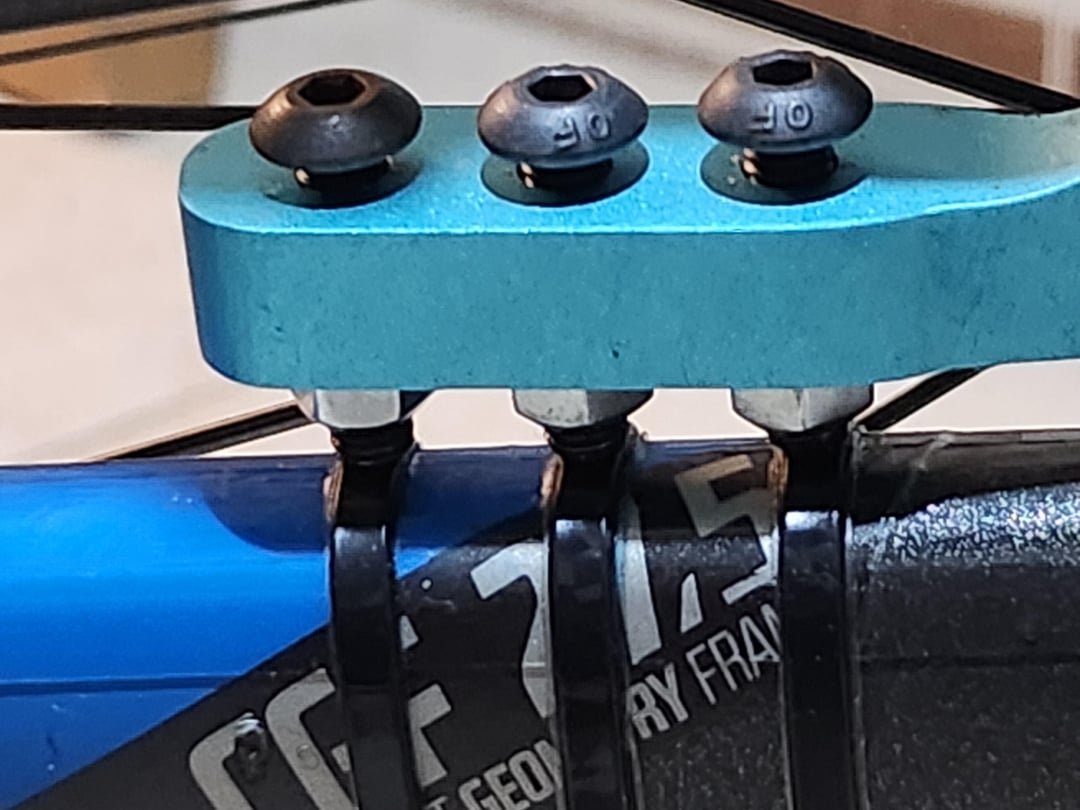
Are those… zip ties?
No-Background4089 on
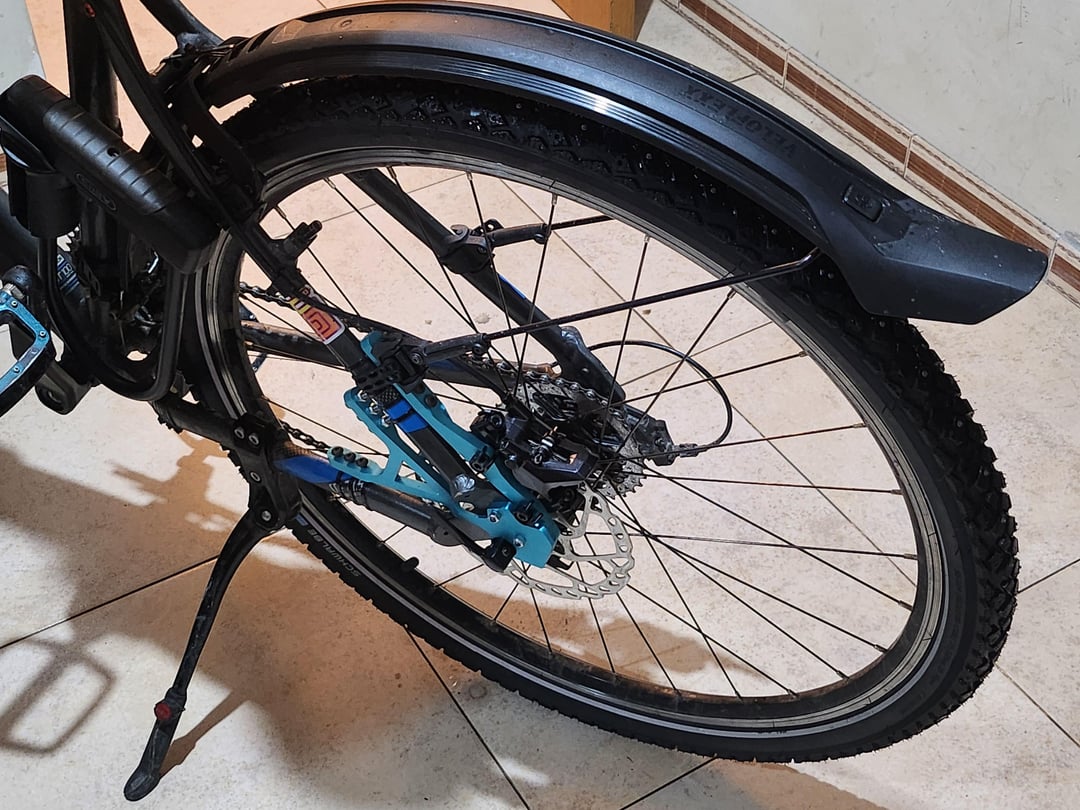
Some more details:
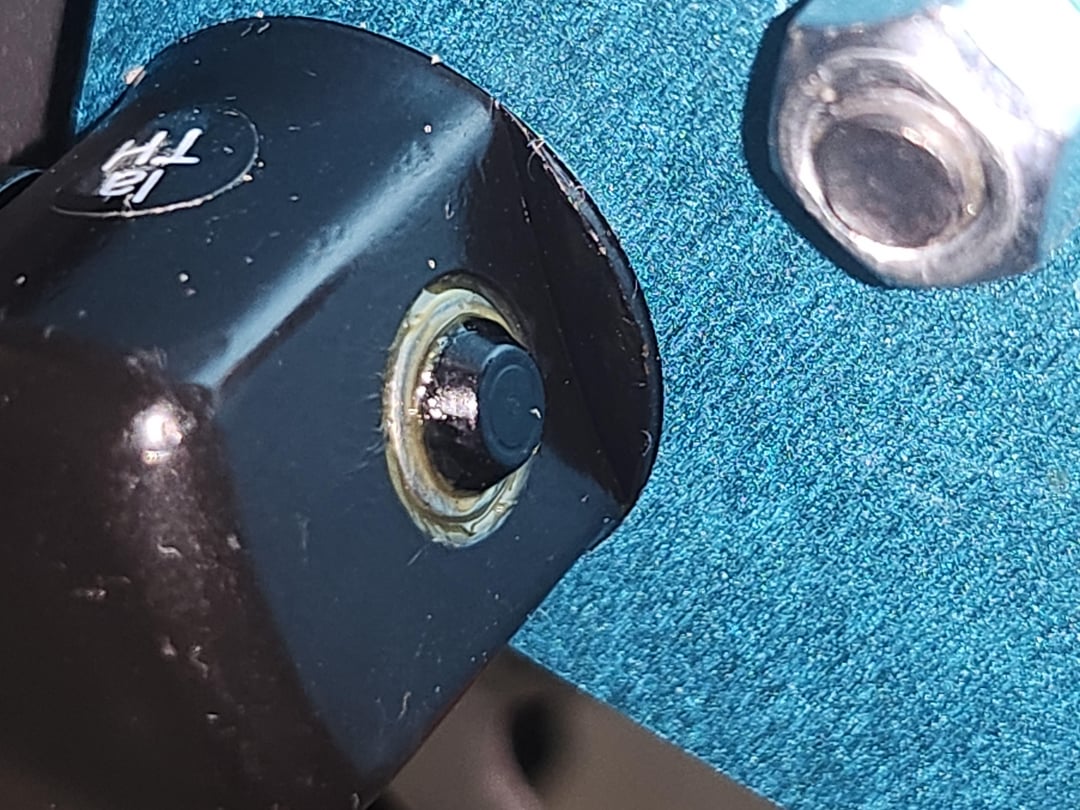
– all bolts are now 10.9, all nuts are locknuts
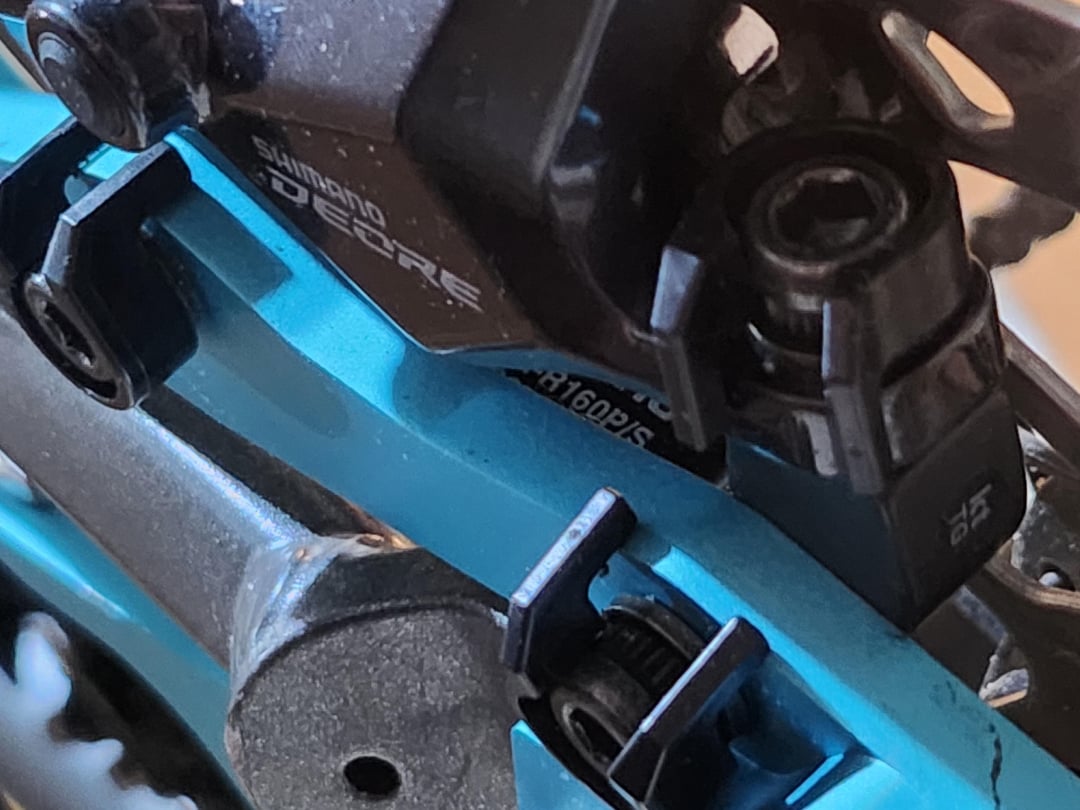
– double shimano safety pins for extra added safety!!
– I did the calculations, and without the seatstay support triangle the torque limit should be at around 70% of the torque needed to rip the rotor off the hub, assuming it uses 12.9 bolts. Much better than the previous result od 10% when there were only 2 8.8 tensile strength bolts.
– One of the fatal breaking points of the previous design was the position of the caliper, as it made the wheel want to escape the seatstay once the brake was engaged. This is why I moved the caliper to a classic position. This issue shouldn’t be an issue now
– The QR still holds on to the adapter, but now the hole is a bit recessed. This is not visible on the photos, but I thought why not. Good thing I added the extra tolerance milimeter on the design stage, otherwise the shimano QR wouldn’t have fit.
– The 2 non-standard pseudo-IS holes are specifically designed so that the IS2PM160 adapter brings the 2 PM holes to the same place the old IS2PM180 would have brought them when mounted to the standard IS holes. The standard IS holes are too close to the axle to fit above the seat stay tube, which is why I had to do that. I did the maths and it worked out perfectly!
– No, the caliper could not have been placed in-between the seatstay and the chainstay
Overall it was a nice journey. I’m still constantly checking my wheel and the dropouts and all the bolts, but I have faced no problems so far, like the ones in the previous design when the wheel would self-eject 🤪🤪🤪🤪
Legitimate-Forever-6 on
Somebody got a wild hair lol! Way to keep busy!
heyheni on
fascinating! 😲
Eat_Your_Paisley on
You’ve got skills for sure!
Elaborate_Collusion on
Hey! I’ve got the same frame and lack of rationality as you, so please let me know how this holds up long term.
BalorNG on
Given your tools, I think you can take a bit more time and CNC a whole frame 🙂
bdog2017 on
Your design and cnc skills are on point.
Over_Killed on
I dont hate it
CotterMasseuse on
This is nuts but so cool.
Cheers!
El_Douglador on
I think I’d prefer the More-weld version
rgcred on
I’m a big fan of using my brain and skills to solve problems, even if there’s an easier way that can be ordered from Amazon. Kudos on your innovative solution and skill set!

25 Comments
https://preview.redd.it/a6w9hjg2eu8e1.jpeg?width=1290&format=pjpg&auto=webp&s=2d3d44cd0a0e074cf0d703e6618b899c9d5e4ed0
Dude you’ve got an unused canti post right there, just look up Brake Therapy and mimic what they did.
edit: that came out a bit harsh, but clearly you know how to fab stuff I just think the shown solution is clunky and unnecessarily complex while also having drawbacks.
Simpler to get a frame that takes a disc brake.
A v brake has never made me this mad
Are those… zip ties?
Some more details:
– all bolts are now 10.9, all nuts are locknuts
– double shimano safety pins for extra added safety!!
– I did the calculations, and without the seatstay support triangle the torque limit should be at around 70% of the torque needed to rip the rotor off the hub, assuming it uses 12.9 bolts. Much better than the previous result od 10% when there were only 2 8.8 tensile strength bolts.
– One of the fatal breaking points of the previous design was the position of the caliper, as it made the wheel want to escape the seatstay once the brake was engaged. This is why I moved the caliper to a classic position. This issue shouldn’t be an issue now
– The QR still holds on to the adapter, but now the hole is a bit recessed. This is not visible on the photos, but I thought why not. Good thing I added the extra tolerance milimeter on the design stage, otherwise the shimano QR wouldn’t have fit.
– The 2 non-standard pseudo-IS holes are specifically designed so that the IS2PM160 adapter brings the 2 PM holes to the same place the old IS2PM180 would have brought them when mounted to the standard IS holes. The standard IS holes are too close to the axle to fit above the seat stay tube, which is why I had to do that. I did the maths and it worked out perfectly!
– No, the caliper could not have been placed in-between the seatstay and the chainstay
Overall it was a nice journey. I’m still constantly checking my wheel and the dropouts and all the bolts, but I have faced no problems so far, like the ones in the previous design when the wheel would self-eject 🤪🤪🤪🤪
Somebody got a wild hair lol! Way to keep busy!
fascinating! 😲
You’ve got skills for sure!
Hey! I’ve got the same frame and lack of rationality as you, so please let me know how this holds up long term.
Given your tools, I think you can take a bit more time and CNC a whole frame 🙂
Your design and cnc skills are on point.
I dont hate it
This is nuts but so cool.
Cheers!
I think I’d prefer the More-weld version
I’m a big fan of using my brain and skills to solve problems, even if there’s an easier way that can be ordered from Amazon. Kudos on your innovative solution and skill set!
This is wild. Send it.
https://preview.redd.it/8nhjdjb9mu8e1.jpeg?width=900&format=pjpg&auto=webp&s=8f4a1b45042fac5ba9800fff6bf744c71faf5466
Hell yeah. Keep on rolling brother.
Oh jeebus just buy a new frame
Mio dio
some problems don’t need solutions.
Disc brakes and zip ties – what could go wrong!
Somehow this is weirdly fascinating. I’m scaroused
I’ve been riding rim brakes my whole life. Im 55 now. Still don’t see the NEED for disk brakes.