
Hello, like many Brompton users I purchased a cheaper alternative rack to make the bike roll easier while folded. These racks are fine for this purpose, and do the job at a far discounted price compared to the OEM offering. As of yet I haven't loaded any weight on it so can't comment on its functionality as an actual rack.
The main problem is a lack of installation instructions. IMO all the videos on youtube, and the images I've found of the rack mounted on a bike, miss a few key details. In an effort to save others time, this small guide serves to point out some things that you might overlook.
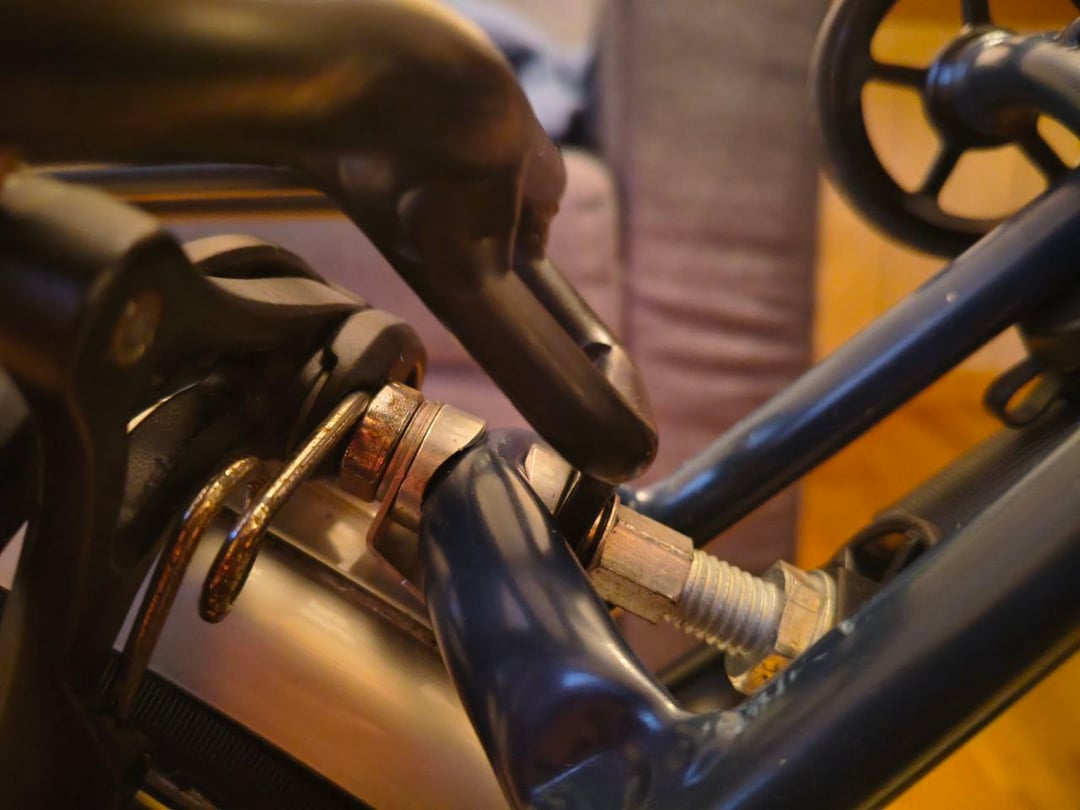
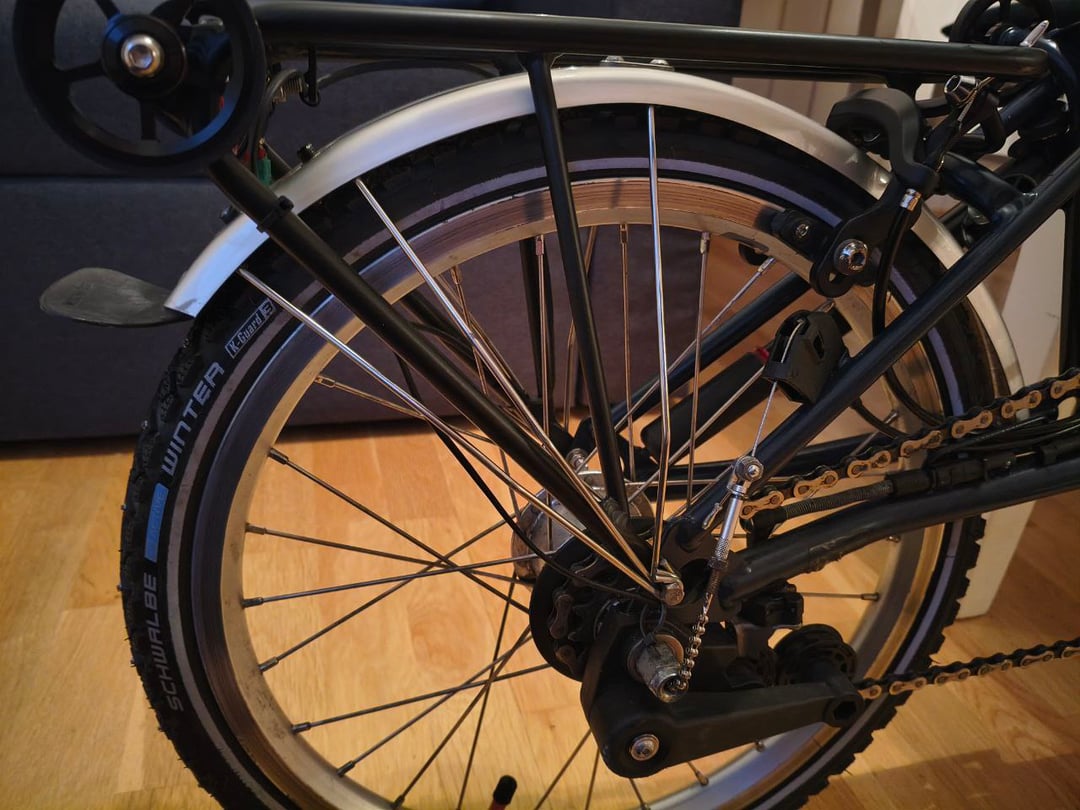
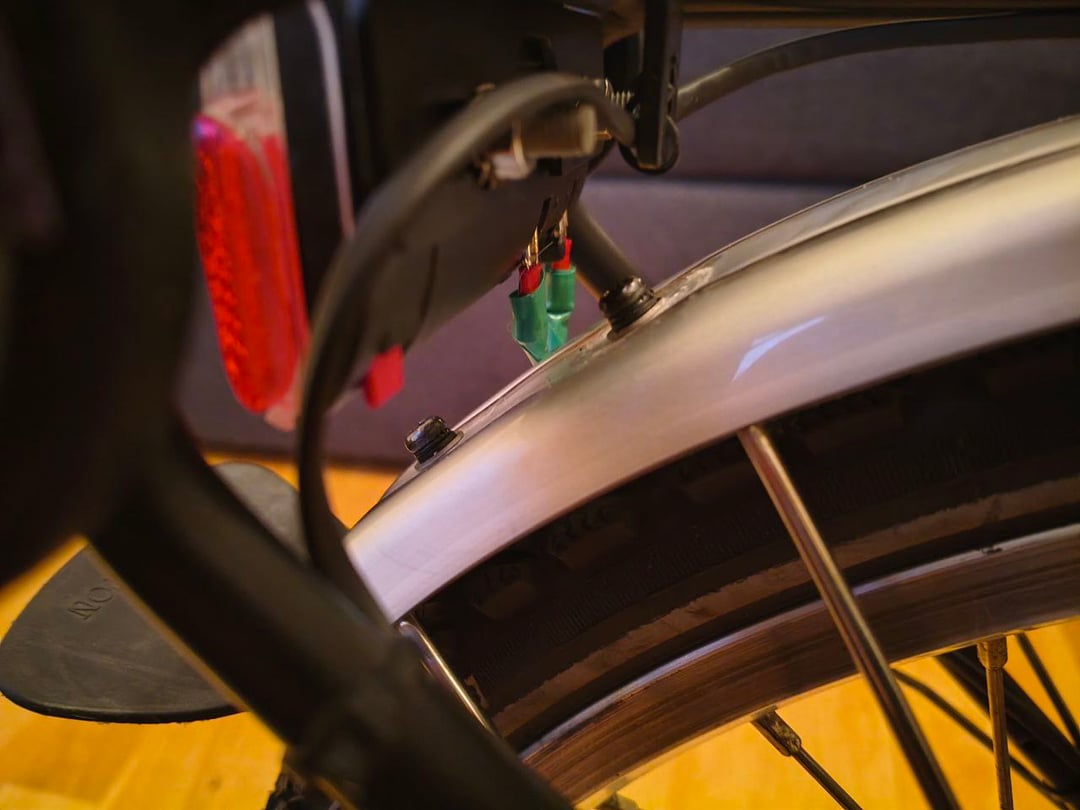
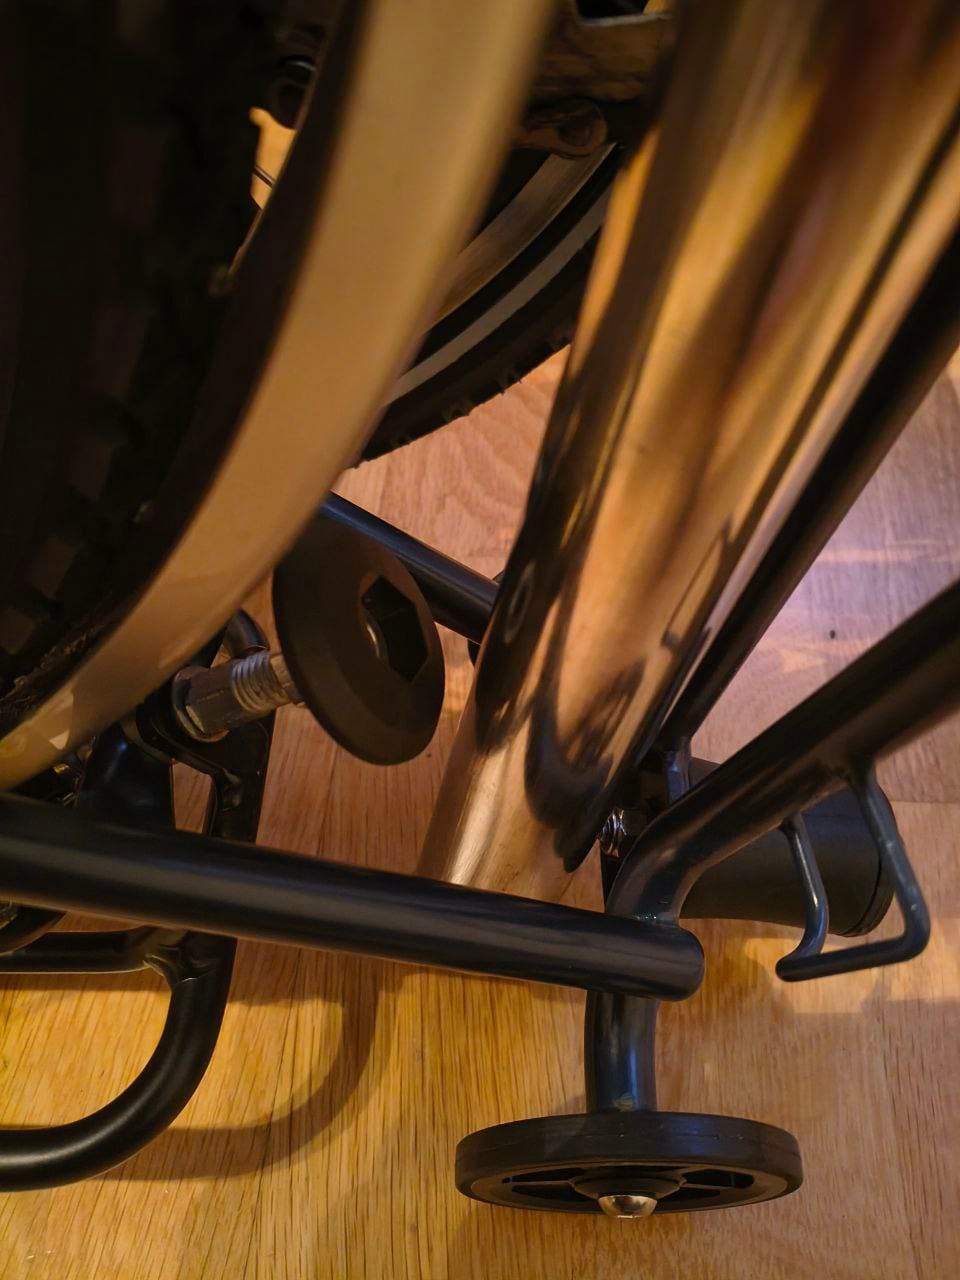
The key issues that need addressing are the order of parts as they mount to the rear brake assembly (image 1) and the fact that the rear mudguard support struts should be mounted on the outside of the rack arms on the rear triangle (images 2 and 3).
The order on the rear brake assembly goes (from back to front):
Brake caliper
Washer
Mudguard
Curved washer
Bike frame
Curved washer
Rack
Spring Washer
Washer
Nut + fold stopper
Putting the rack on this side of the frame is necessary to ensure the frame folding stopper is closer to the seatpost when the bike is folded and the seatpost is down (image 7). This distance should be 1-2mm. If you install the rack between the brake caliper and the frame triangle (as with the official brompton rack) this distance will be far larger.
Secondly, having the mudguard support struts outside of the rack arms is just far more sensible and strengthens the whole assembly. I believe it was actually designed to be installed this way, but this is the one thing overlooked by every youtube video I watched.
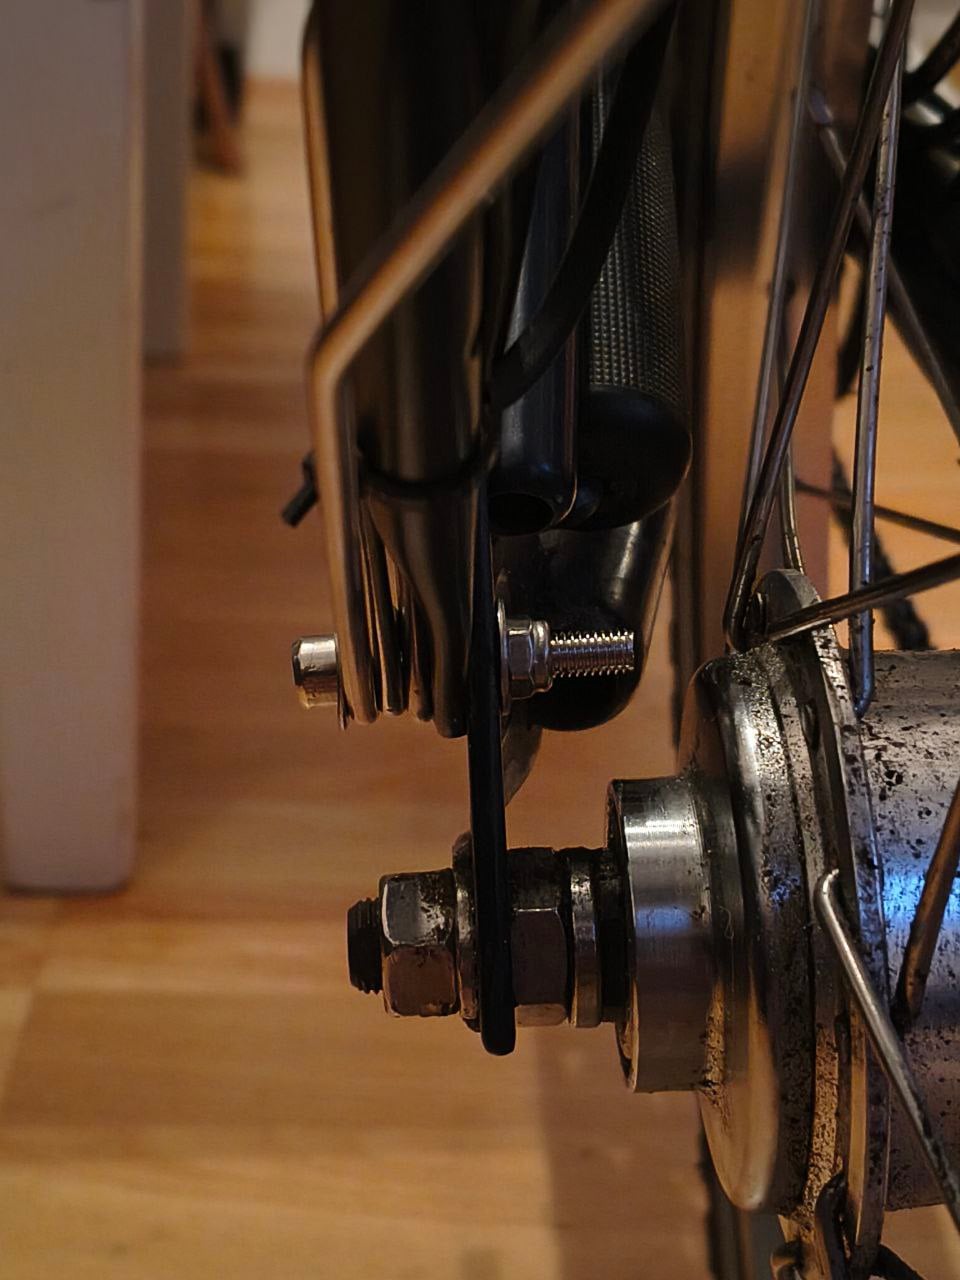
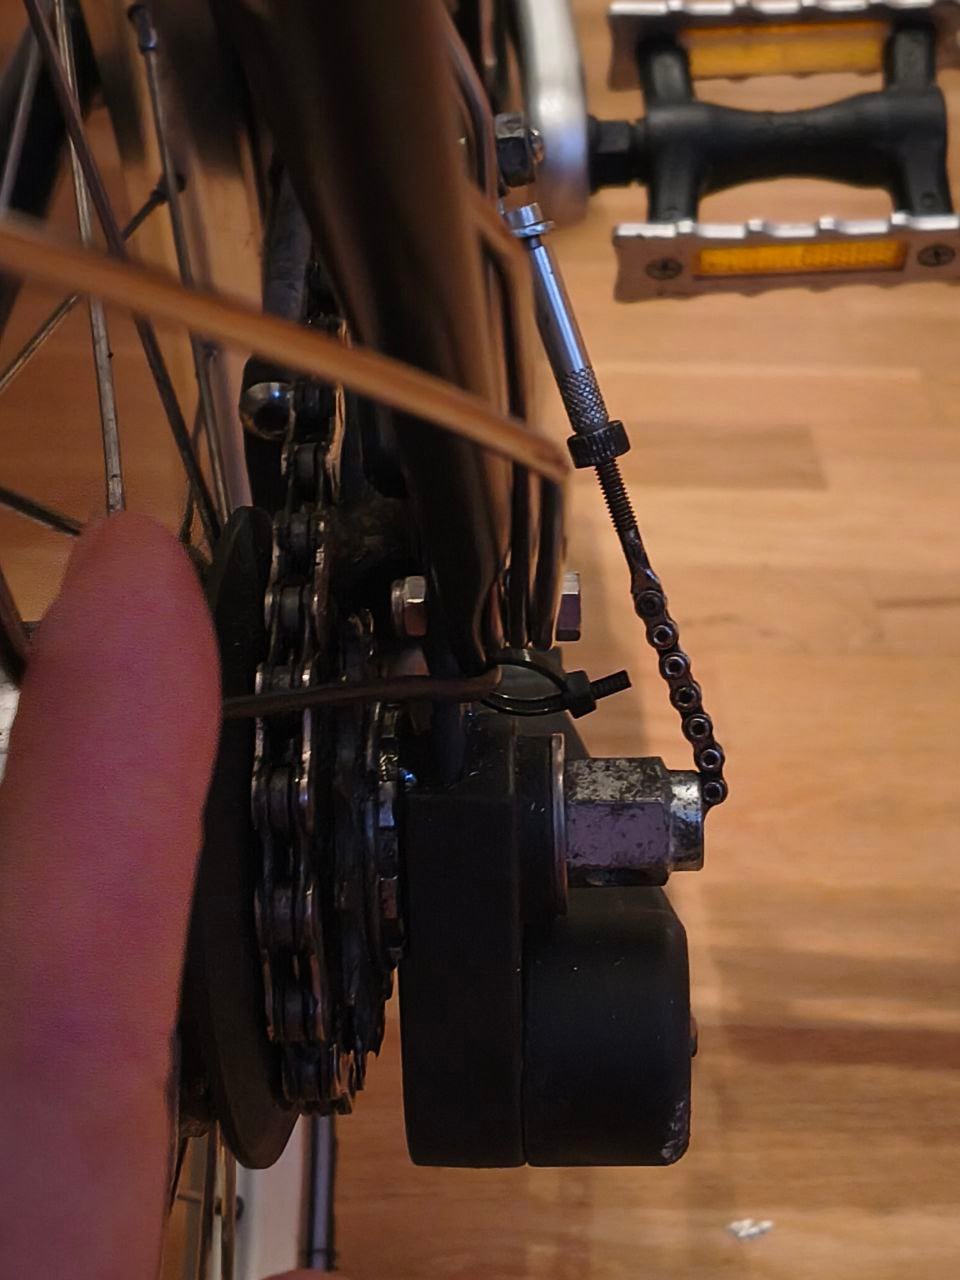
The bolts installed in the frame at this point are M5 X 20. These are just about long enough to still work with the rack installed, as long as you omit the washers! (image 6) If you want to replace these bolts with longer ones (I would advise) then you need to remove the rear wheel. Replace with m5 x 25. I only had m5 x 30 lying about, and it was too long for the drive side causing interference with either the 'cassette' or the IGH chain.
Brief overview of steps you need to take:
1. Unfold the bike and deflate the rear tyre (trust me, this will make it easier)
-
Unscrew the rear brake assembly, removing the folded stop block
-
Unscrew the mudguard support mounts on either side of the rear triangle (2x8mm spanners required)
-
Remove the mudguard from the bike (trust me, this will make it easier)
4b. Remove rear wheel and replace the two mudguard strut bolts with M5 x 25, refit rear wheel. (optional extra step).
-
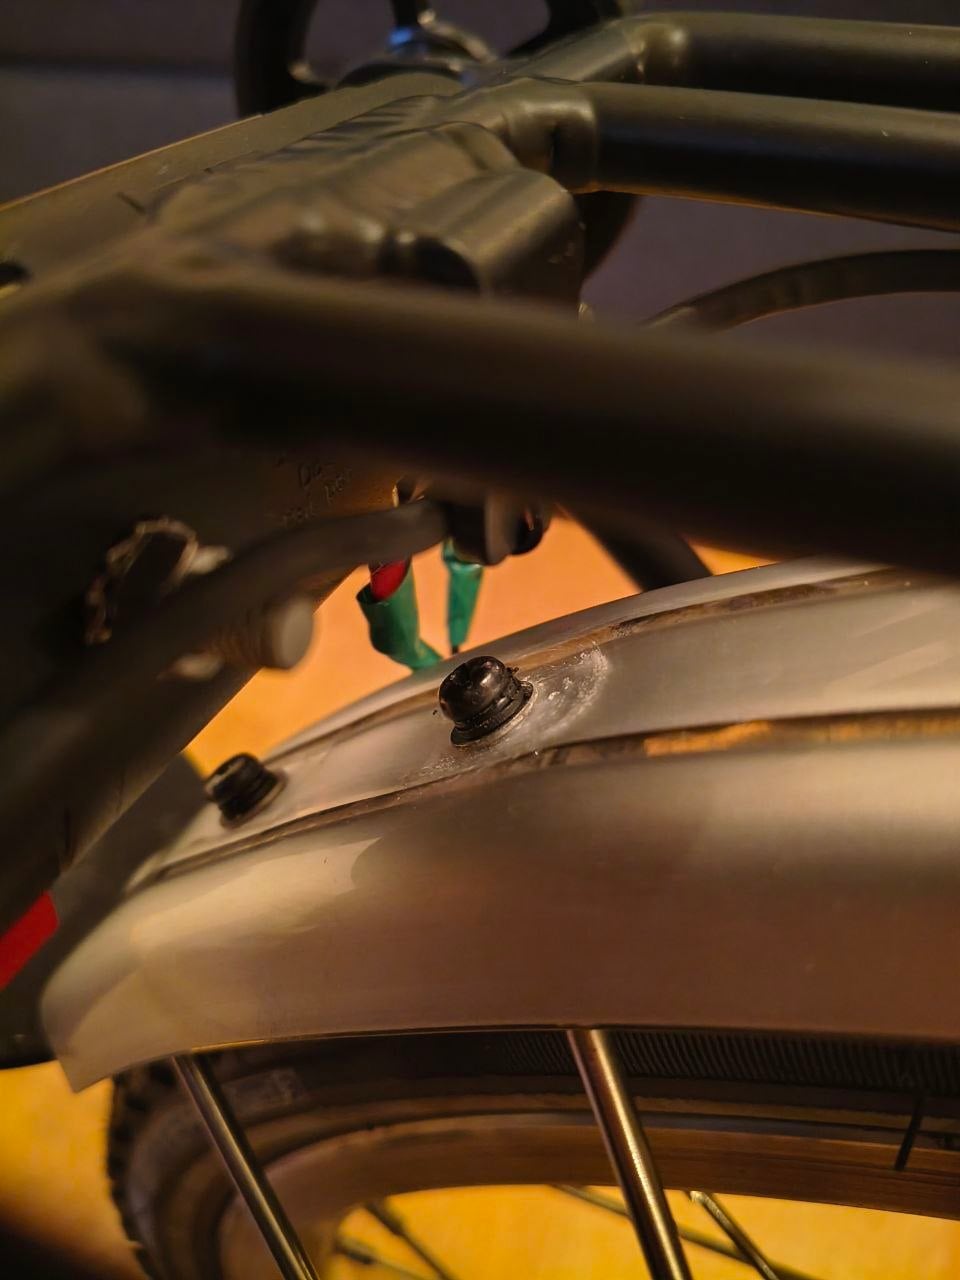
Remove the small mudguard roller wheel (7mm spanner on the underside). Undo the two nuts first before the bolt, as the allen head on the bolts strip very easily if you put any torque on them. I stripped mine and had to replace with the black ones as shown.
-
Replace the small mudguard roller wheel assembly with washers. If you don't do this you risk the bolts sticking too far through the mudguard and contacting your tyre once reassembled. (Images 4 and 5).
-
Replace the 2x mudguard support struts that came loose when pulling off the mudguard roller wheel. These are different so remember which is which! Attach the nuts and tighten them down so your mudguard is now complete without the rear roller wheel.
-
Each side of the bike has 3x mudguard support struts. Feed the middle one through the rack triangle on each side. See image 3 for what I mean
-
Feed the mudguard back under the rear brake caliper, while the rack goes over the caliper, and attach to the brake caliper mounting bolt in the order shown above. Be grateful you deflated your rear tyre before attempting this.
-
Loosely do up the rear brake caliper assembly.
-
Fit the rack arms to the rear triangle. fit the three mudguard support struts on the bolt in the correct order (rear strut is outermost, front strut is innermost). Loosely do up these bolts
-
Make sure everything is aligned (including the rear brake caliper!) before tightening these 3 bolts down.
-
Attach your rear light to the rack, and if it's dynamo powered run the cabling neatly
-
Inflate your rear tyre. Make sure it doesn't rub against the bolts on the mudguard.
-
Go for a slow ride. Make sure your rear brake still works as designed.
-
Test the fold, and adjust the position of the stop block.
16b. Wash your bike before uploading images to reddit (I skipped this step)
When installing this rack I ended up wasting an hour redoing it several times copying others, before doing it this way. Hopefully this guide saves you that hour and you spend it riding instead of screwing.
by blynd_snyper